Sanded Grout Versus Non-Sanded Grout

Sanded Grout Versus Non-Sanded Grout

Sanded Grout Versus Non-Sanded Grout

In previous articles, we have discussed lots of things about tile installation, flooring, backsplashes and choosing the right tiles for the application. Here we are, with a complete guide about choosing the best grout for the job. Grout refers to the mortar that is used to bind the tiles (whether on the floor or backsplash). Unlike thin set that is used to connect the tiles with surface, grout serves two purposes; it binds the tiles and it also make tiles water-proof.

Keeping tiles at a certain distance from each other gives the whole floor a better look and that’s why grout is applied to cover that distance. Grouting becomes one of the most important parts of the project in application where tiles have direct contact with water. In stores, you can find many types of grouts that are advertised to be suitable for different jobs but in a nutshell, there are only two types of grout; sanded and non-sanded grout.

What Is the Difference between Sanded and Non-Sanded Grout?

Interestingly, the main difference between sanded and non-sanded grout is already mentioned in their names. Although both of these types have some variations but a sanded grout comes with silicon based sand in it while non-sanded grout is a must more smoother mixture of cement with no sand in it. This difference results in different performance of these grouts in different conditions; for example, sanded grout do not shrink or crack easily but they are only suitable for joints larger than 1/8 inch joints because it would be almost impossible to force that thick mixture into small joints.

Divi WordPress Theme

On the other hand, non-sanded grout should be used in wider joints because it is not immune to cracking and it gets messed up by continuous interaction with direct water. Now, many of the hardware stores even sell wide joint mixture as a separate product; these mixtures come with a higher ratio of sand and they are recommended for wider joints.

DTLA Tile Sanded Versus Non-Sanded Grout Infographic

So, The Joint Size Is The Ultimate Factor In Choosing Sanded Or Non-Sanded Grout?

Yes and no; joint size is the most important factor but in some cases the type of tile matters too. As you can imagine, sanded grout can easily scratch glassy surface and polished tiles; so using sanded grout with marble tiles is not a great idea, considering the joints could be covered by non-sanded grout.

Similarly, it is recommended to use sanded grout in floor tiles because it don’t crack or break easily even with lots of traffic on it. That’s pretty much the basics of it and selecting the best grout for a particular job should be based on all of the factors mentioned above.

In Which Cases Sanded Grout is a More Suitable Option?

  • Sanded grout must be your first and default choice for any kind of tiling (whether flooring or backsplash installation). It is easily available everywhere and there are lots of available colors to match with your tiles.
  • For tile joints with average distance or more, sanded grout is the best option as it binds the tiles perfectly and does not crack easily.
  • With all the tiles where possible scratching is not an issue, you can use sanded grout. Most of the time people get professional help for installing polished tiles (because they are more expensive) and with normal tile surface they feel confident to do it on their own. In those cases, sanded grout is a suitable option.
  • The price is also a deciding factor here; sanded grout costs almost half than non-sanded grout and the reason is pretty simple; in sanded grout, the sand itself is a big part of the mixture and sand is cheap. On the other hand, in non-sanded grout, expensive chemicals are added to make it smoother.
  • Most of the hardware stores keep more color options for sanded grout as compared to non-sanded grout because sanded grout is more popular and widely used.

In Which Cases Non-Sanded Grout is a More Suitable Option?

  • Sanded grout might be your first choice, but in some cases where the tile joints are too narrow, it would be practically impossible to use sanded grout because of its thickness and forcing the mixture between tiles is not an option.
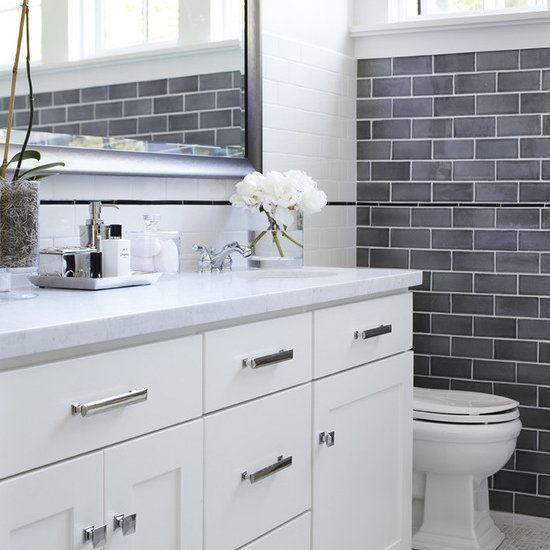
  • Sanded grout makes it difficult for non-professionals to apply it on vertical surfaces like while installing backsplash or bathroom wall. The non-sanded grout works better in vertical applications because it sticks better than sanded grout.
  • As mentioned above, some particular types of tiles like glass, stones, marble and even some types of ceramic and porcelain tiles are easily scratch-able and in such cases using non-sanded grout would be a better idea.

Some Tips and Tricks of Using Sanded and Non-Sanded Grout

Because of the manufacturing process and the color pigments used in non-sanded grout, when you clean the surface with water, the water also carries color pigments with it and as a result the color of grout gets a little lighter than the actual color shown in charts. That’s why it is a better idea to choose a slightly darker shade of grout so you can get the desired color. Asking the in-store assistance about it would be a good idea because this phenomenon might not apply on all of the manufacturers or some manufacturers might have resolved it by improving their color chart.

According to some experts in the field, using non-sanded grout is a double edged sword; it is not only difficult to install as compared to its counterpart but it is also develops cracks with it comes in direct contact with water. The interaction with water can also lead to mold within tile joints and that particular issue could only be resolved by getting professional help to remove grout and re-install it.

How to choose tile

How to choose tile

How to Choose Tile

Installing new tiles in your kitchen and bathroom increases the house value significantly and that’s why many people install new tiles before putting their house on the market. The cost of tile installation varies drastically depending on many different factors; however, regardless of the investment, it always pays off in many folds. Many people make tile installation a weekend DIY project (yes, it is possible to install tiles in 48 hours) while some people hire professional help.

Whether you get professional help or opt for DIY project, it is your job to select the tiles. There are some obvious factors like size, color, texture, type and cost that play an important role here. Also, you need to consider the application as well; for example, a particular type of tile may good as a backsplash but might not be suitable for kitchen or bathroom flooring.

What Are Some Types of Tiles and How Much They Cost?

The actual cost of the tiles may vary from vendor to vendor yet we can make a pretty accurate estimate of the total cost of the project. Let’s talk about different types of tiles, their ideal uses and how much they cost.

Ceramic

Ceramic tiles are the most popular ones and they are easily available everywhere. These tiles are usually made by mixing clay, minerals and water. After putting them in high temperature, glass coating is applied to give it a scratch resistance exterior. Because of their cost efficiency, durability and easy availability, Ceramic tiles are suitable for DYI projects. Because of the manufacturing process, two different lots of Ceramic tiles may have slightly different color so you need to buy reasonably extra tiles for adjusting breakage and wastage. These tiles usually cost around $2 to $7 per square foot.

Glass

Glass tiles are more expensive than many of the other types of tiles. The advantages of using Glass tiles are its colorfulness, availability of lots of designs and colors, easy to clean surface and 100% water resistance that make them a suitable option for backsplash. However, they are not easy to install and you might need professional help to install them perfectly.  Also, you need to handle adhesive carefully because it would be visible from the front side. Glass tiles usually sell for $7 to $32 per square foot.

Stone

Just like ceramic tiles, Stone tiles are also very popular and they come in many different types like onyx, marble, sandstone, granite and others. The advantages of using Stone tiles are a wide range of types, colors and texture as well as many of their uses. For example, many people use granite tiles as countertop. However, Stone tiles are considered fragile when it comes to water and chemicals; you need to carefully seal the spaces between tiles. Stone tiles usually cost $6 to $15 per square foot.

Divi WordPress Theme

Porcelain

Porcelain tiles are also made with the same process as ceramic tiles but they are treated with higher temperature. This technique increases their density and solidity. Because of the les absorbent surface, Porcelain tiles are suitable for backsplashes and bathroom flooring. Just like ceramic tiles, Porcelain riles are also easy to install and easy to maintain. Unfortunately, Porcelain tiles have the same issue of color difference as ceramic tiles. Also, because of less spongy exterior, you need to choose a suitable adhesive for Porcelain tiles. These tiles have similar price tag of around $2 to $7 per square foot.

Cement

Cement tiles are slowly getting obsolete because of the availability of better and more cost efficient options in the market. These tiles are handmade and that’s why they come with a higher price tag. No doubt they are beautiful butthey are hard to install and many of the professional tile installers don’t have any meaningful experience working with Cement tiles. These tiles do not respond well to detergents and other chemicals. Cement tiles cost around $7 to $19 per square foot.

How to Choose the Best Tiles for Your Bathroom or Kitchen?

Now you know different types of tiles, their price range, their advantages and disadvantages. Of course these factors play an important role in choosing the most suitable tiles yet there are many other factors you must consider here.

Understand Application Requirements

The actual application is probably one of the decisive factors in choosing the best tiles. As you know, some tiles are water resistant while others need careful maintenance, so tiles that would be a good fit for bathroom floor wouldn’t be necessarily good for backsplash in kitchen or for kitchen floor.

Understand Different Tiles

You need to understand the difference between types of tiles to choose the most suitable one. For example, glass tiles could be used for backsplash in kitchen and walls in bathroom but they are not a good fit for flooring. Similarly, stone tiles could be used anywhere while ceramics and porcelain tiles are suitable for flooring.

Consider Your Budget

Different types of tiles have different (and drastically varying) price tags. Ceramic and porcelain tiles are inexpensive but art ceramic tiles and tiles with custom designs could be expensive. It is better to set a budget first and then find a suitable tile around that number. For cost estimation, you can either use professional help (as many of the stores provide that for free) or you can do it yourself.

Consider the Existing Architecture

It is highly recommended to go with the flow instead of going against the existing architectural style of the house; and this advice goes the both ways. If the house is quite fancy then you need to spend money on tiling too because otherwise it would look odd.

Consider Your Lifestyle

You need to consider your lifestyle as well as the factor of convenience while choosing the tiles for your kitchen or bathroom. Although plain shiny tiles look good in store but they are too slippery and they would be dangerous especially for kids; so, create a balance between aesthetics and comfort.

How to tile a Bathroom Floor

How to tile a Bathroom Floor

How to tile a Bathroom Floor

Replacing the old floor of your bathroom with new shining tiles have two major advantages; it can give your bathroom an entirely new look (depending upon the use of colors) and it can increase the overall value of your house. So, especially if you are going to sell the house in near future, make an investment of few hundred dollars on new bathroom floor and it would pay off in thousands.

There are many different types of floor tiles while ceramic and stone tiles are pretty common because of their cost efficiency, look and for being easy to install. Another advantage of using ceramic and stone tiles is freedom of choice; there are hundreds of different colors and textures to choose. However, because of the manufacturing process, two different batches of the same color might have slightly different shade so buy little more tiles than your actual need.

How Much It Would Cost to Tile a Bathroom Floor?

The cost to tile a bathroom floor in Los Angeles mainly depends on two things; the size of the bathroom (means how much tile you are going to use) and what you are going to do with the old flooring. In some cases, if you have enough confident to do the job and enough patience to perfectly align and level the tiles then you can do the job yourself, considering you keep the old flooring as it is and put an underlayment. Unfortunately, this might be not possible because of one of many reasons.

If it is necessary to remove the old flooring then you need professional help to avoid the mess an unprofessional person can make while removing the old flooring or repairing it. Installing new tile floor in the bathroom would cost around $250-750 depending on the size of the bathroom and what kind of tiles you use. You can get ceramic or stone tiles for $5 to $15 per square foot with good quality. However, if you want to get things done then you can go as low as $2 per square foot and can go as high as $60 per square feet.

How to Tile a Bathroom Floor?

  1. You can measure the size of bathroom yourself and don’t forget to add extra 10% tiles for wastage and breakage.
  2. The first step of installing tiles on bathroom floor is to prepare the room. Cover the toilet hole first and then cover everything else like vanity and sink.
  3. Now, scrub the old flooring with abrasive pad to clean it perfectly.
  4. Apply thin set with notched trowel and lay down the tiles one by one. Never mix too much of the thin set as it gets dry pretty quickly and lose its usefulness, even adding water is no good so mix a little, apply it and mix some more.
  5. After setting the tiles, you need to wait for several hours so the thin set can dry.
  6. After that, the floor would be ready for applying grout. Fortunately, grouting isn’t as difficult as applying thin set; all you have to do is put grout on the tiles and fill the gaps with trowel.
  7. Now remove the excessive grout with cheesecloth and sponges. You can add extra water and make grout thinner to make it easy to work with but making it thinner has its own disadvantages. Now let’s talk about these steps in details.
Now let’s talk about these steps in details.

Material and Equipment

  • Thin set (based on the tile type)
  • Grout (based on the tile type)
  • Sealer (based on the tile type)
  • Tile cutter
  • Sponges and cheesecloth
  • Few Buckets
  • Tape measure
  • Notched trowel
  • Abrasive pads and sand paper
How To Tile a Bathroom Floor Infographic

Measuring the Floor

Use tape measure to measure the floor area. If the bathroom is rectangle, then this step would be easy. If it isn’t, then measure the area of all rectangles and count the total. Usually it is recommended to add 10% extra tiles to adjust for breakage, cutting and wastage but the more complex design your bathroom floor has, the more tiles it would consume. So, it is better to buy a little extra to avoid the headache of buying few more tiles in case you need them later.

Prepare the Area

Definitely you don’t want to create a mess and damage the toiler and other things like sink and vanity. So, remove things you can and cover everything else. Thin set is easy to remove when it is wet but once it gets dry, it would hard to remove from toilet or sink so better safe than sorry.

Divi WordPress Theme

Use abrasive pads to clean the floor. Make sure there is no dirt left there. If the floor it too smooth, it won’t hold tiles so you need to use combination of sand paper and abrasive pad to make it a little rough and dirt-free.

Apply Thin Set

Mix thin set but do not mix too much at once because it gets dry pretty fast. Once it gets dry, it is a total waste and you can’t make it soft again with water. So, mix a small amount (that you can apply in few minutes) and then use notched trowel to apply it on the floor. The purpose of using the notched side of trowel is to make edges that would hold the tiles firmly.

Install Tiles

Install tiles when the thin set is still wet; if you are doing it for the first time, you would definitely get some thin set on tiles. This is not a big deal and you can remove it easily with sponges when it is wet. If it dries out, it would be difficult. The drying process could take many hours (up to 24 hours) so wait patiently.

Apply Grout and Sealer

Put some grout on the newly installed floor and use sponges to spread it out so it can cover the gaps between tiles. Grout is not as hard as thin set and you can make it thinner by adding water. After filling all the gaps, remove the excessive grout with the help of sponges and cheesecloth. Grout usually takes 48 to 72 hours to dry completely and after than you can apply the sealer for water resistance.

Some Tips About Tiling a Bathroom Floor

As mentioned above, if you are confident and have enough patience, you can tile the bathroom floor yourself; however, in most of the cases you need professional help to do things perfectly. Following are some tips about tiling a bathroom floor that can help you in DIY projects.

Attention to Details

Tiling the bathroom floor is a work of precision and you should understand that small details make a big different. Attention to details would give your bathroom floor a more polished look than normal.

Tile Size

People usually think that a one foot tile would be exact 12 inches but that’s not the case. Tile manufacturers consider the space between tiles before naming them one foot tile so it would be slightly lesser than 12 inches. If you are planning to tile the bathroom yourself, ask the store for a tile sample and measure it precisely to get the idea of actual sizing.

Doors and Windows are the Weakest Links

You need to ensure tiles are sealed perfectly and water cannot go behind the tiles. Unfortunately, it is easier said than done because doors and windows make it extremely difficult. The process of waterproofing doors and windows might take some extra time and efforts but it would increase the life span of the job drastically.

Water Drain Level

Depending on the exact position of the drain in your bathroom, you need to adjust tiles for water drain level. Smooth water flow in the right direction not only reduces the overall dry out time after shower but also increases the durability of tiles and grouting.

Remove Sanitary-ware if Possible

You can install tiles around sanitary-ware but it is recommended to remove everything you can before tiling because of three reasons; first of all, during the tiling process, they could get damaged and you would be unable to concentrate on the world while avoiding possible damage all the time. Second, removing the sanitary-ware would allow you to make a much more better finish. And last, an easily removable sanitary-ware would ensure the replacement easier any time in the future.

Choose Adhesive Carefully

Always ask the store for the recommended adhesive for the tiles you’ve chosen. You can select either ready-made adhesive or powder based one. However, powder based adhesives are more popular because you can control the water ratio and thickness of the solution as per your requirements.

Backsplash Installation

Backsplash Installation

Backsplash Installation

The best way to increase the overall value of your house is to upgrade your kitchen and bathroom. Contrary to popular belief, you don’t have to spend a hefty sum of money to make your kitchen aesthetically pleasing. Unlike tile flooring, you don’t even have to move appliances and cabinets for backsplash installation. Let’s see how it could be done, what tiles to choose and some amazing tips about backsplash installation.

How To Tile a Kitchen Backsplash

Step 1: Getting Suitable Tiles

Of course the first step of installing backsplash is getting suitable tiles for your kitchen. Once you are in the tile showroom, you would see lots of different types of tiles and so many options would confuse you. It is better to prepare yourself before visiting the store. The salesperson can help you there but they don’t know what you want better than you do.

  • Some of the factors that distinguish different types of tiles and can help you choose the most suitable tiles for your kitchen are: cost, durability, installation process, color availability, water resistance, cleaning process and

Let’s take a look into different types of backsplash tiles.

Ceramic

Ceramic tiles cost almost $2-$6 per square foot. This is the most common type of backsplash tiles and the reason behind its popularity all over the globe is cost efficiency, durability, a wide range of available colors and designs and the installation process which is pretty easy. However, it is difficult to get the exact color match in two different batches of Ceramic tiles.

Porcelain

Porcelain tiles are quite similar to ceramic tiles when it comes to pricing and manufacturing process except Porcelain tiles are made at a much higher temperature. It offers all the benefits of ceramic tiles and because it is more dense and has less pores, Porcelain tiles are impact resistance and easy to clean. However, because they are less porous, Porcelain tiles need special material for setting.

Glass

Glass tiles are considered the most expensive and most classy ones among all. Usually they cost around $7 to $30 per square foot. Glass tiles are colorful, easy to clean, excellent water resistant and shiny. As you can anticipate, glass tiles are very difficult to install and without experience and expertise, it is impossible to install them perfectly.

Divi WordPress Theme

Cement

Cement tiles are also known as Cuban tiles in many parts of the world and usually these are handmade. The best thing about Cement tiles is their beauty and rareness as they can give your kitchen a classical look. However, because they are rare, not every tile installer has expertise in working with them. Cement tiles cost around $6 to $17 per square foot. Also, Cement tiles need periodic sealing every few years.

Stone

There are many different types of Stone tiles and their prices vary from $6 to $15 per square foot. The best thing about Stone tiles is their luxury looks. However, these tiles are not durable and could be damaged easily with water, acidic elements and detergents.

DTLA Backsplash Installation
DTLA Tile Installation
DTLA Tile and Stone
Backsplash Installation Steps

Step 2: Gather the Equipment and Material

Now you have selected the desired tiles, it is time for gathering the equipments.

  1. Level
  2. Tape measure
  3. Multiple buckets
  4. Sponges
  5. Notched trowel
  6. Tile cutter
  7. Knife
  8. Mixing paddle
  9. Mortar, sealer and grout (based on the type of tile you selected)
  10. Tile adhesive

Step 3: Measure the Area Carefully

Measuring the backsplash area is quite easy if you do it carefully. You would be lucky if the area is perfectly rectangular but in most of the cases, it doesn’t happen. If the area is rectangular, then simply measure the length and width of the area and by multiplying, you get the total area. For example, if the length is 15 feet and width is 3 feet then the total area would be 45 square feet.

If it is not perfectly rectangular but a combination of multiple rectangles then measure the area of each of them separately and their summation would be the total area. You can get help from backsplash installation services in Los Angeles

Step 4: Set up the Area and Wall

Regardless of how carefully you do things, you would be making a mess and that’s why it is important to cover everything else near the backsplash installation area. First of all, remove the electric outlets, switches, lights, cover countertops, cabinets and cover other things near the area. You can use cardboards for covering. Now, you need to prepare the wall; if there are signs of damage, scratches and holes, you need to fill them because the uneven surface can result in uneven tiles.

If the surface is too smooth and shiny, you need to sand it so it can grip the tiles. Make sure the surface is dirt free, oil free, there is no debris and the wall is not greasy. Based on what you apply on the wall, ensure it is perfectly dry before you move to the tile installation part.

Step 5: Apply the Mortar

There are two types of mortar; you can either get powder or pre-mixed solution. The pre-mixed solution is usually good for lighter tiles yet professionals prefer powder option so they can control the density based on the type, size and weight of the tile. After readying the mixture, apply the mortar on wall with flat side of the notched trowel. After that, apply another layer with the notched side of the trowel to create edges. These edges help in holding tiles tightly.

Make sure the mixture covers the wall completely and depends on your speed of applying the mortar only apply on 2-3 square foot area so you can apply tiles before drying out.

Step 6: Tile Installation

Start installing tiles from the main focal point; for example, in kitchen, the main focal point of backsplash is behind the sink. However, it may vary depending on the design of your kitchen but that’s the general rule. Press the tile on soft mortar and meanwhile slightly rotate it in both directions so it can hold the surface. After installing the tiles, check all of them and if there is mortar on a tile, remove it as soon as possible before it gets dry.

Usually the drying process takes 8 hours but the recommended time is 24 hours. This may vary based on the temperature and overall climate but 24 hours are enough in most of the cases.

Step 7: Apply the Grout

You can either buy a pre-mixed grout or make it yourself with powder. Making grout with powder is easy too; you need to add enough water (as per instructions) and mix it well. Ensure to re-mix the solution every 20 minutes or so to maintain the consistency of it. The grout would be applicable within 2 hours of mixing so it is reasonable to prepare small amount of it each time.

Apply the grout and ensure all the spaces between tiles are filled completely. Remove the excessive grout from tiles with cheesecloth but do not damage the grout inside the spaces. Don’t worry about tiles; after the grout dries out, you can clean the tiles with water and cheesecloth.

Step 8: Apply Sealer

Different types of sealers are applied on different types of backsplash tiles. Wait 72 hours for the grout to dry out completely and apply the sealer based on the instructions written on container.

Backsplash installation is practically easy yet it needs perfection; if you are not confident whether you can do it or not, get professional backsplash installation services in Los Angeles.