
Replacing the old floor of your bathroom with new shining tiles have two major advantages; it can give your bathroom an entirely new look (depending upon the use of colors) and it can increase the overall value of your house. So, especially if you are going to sell the house in near future, make an investment of few hundred dollars on new bathroom floor and it would pay off in thousands.
There are many different types of floor tiles while ceramic and stone tiles are pretty common because of their cost efficiency, look and for being easy to install. Another advantage of using ceramic and stone tiles is freedom of choice; there are hundreds of different colors and textures to choose. However, because of the manufacturing process, two different batches of the same color might have slightly different shade so buy little more tiles than your actual need.
How Much It Would Cost to Tile a Bathroom Floor?
The cost to tile a bathroom floor in Los Angeles mainly depends on two things; the size of the bathroom (means how much tile you are going to use) and what you are going to do with the old flooring. In some cases, if you have enough confident to do the job and enough patience to perfectly align and level the tiles then you can do the job yourself, considering you keep the old flooring as it is and put an underlayment. Unfortunately, this might be not possible because of one of many reasons.
If it is necessary to remove the old flooring then you need professional help to avoid the mess an unprofessional person can make while removing the old flooring or repairing it. Installing new tile floor in the bathroom would cost around $250-750 depending on the size of the bathroom and what kind of tiles you use. You can get ceramic or stone tiles for $5 to $15 per square foot with good quality. However, if you want to get things done then you can go as low as $2 per square foot and can go as high as $60 per square feet.
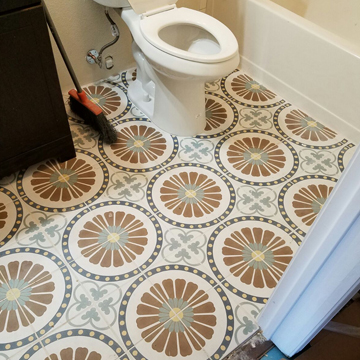
How to Tile a Bathroom Floor?
- You can measure the size of bathroom yourself and don’t forget to add extra 10% tiles for wastage and breakage.
- The first step of installing tiles on bathroom floor is to prepare the room. Cover the toilet hole first and then cover everything else like vanity and sink.
- Now, scrub the old flooring with abrasive pad to clean it perfectly.
- Apply thin set with notched trowel and lay down the tiles one by one. Never mix too much of the thin set as it gets dry pretty quickly and lose its usefulness, even adding water is no good so mix a little, apply it and mix some more.
- After setting the tiles, you need to wait for several hours so the thin set can dry.
- After that, the floor would be ready for applying grout. Fortunately, grouting isn’t as difficult as applying thin set; all you have to do is put grout on the tiles and fill the gaps with trowel.
- Now remove the excessive grout with cheesecloth and sponges. You can add extra water and make grout thinner to make it easy to work with but making it thinner has its own disadvantages. Now let’s talk about these steps in details.
Material and Equipment
- Thin set (based on the tile type)
- Grout (based on the tile type)
- Sealer (based on the tile type)
- Tile cutter
- Sponges and cheesecloth
- Few Buckets
- Tape measure
- Notched trowel
- Abrasive pads and sand paper

Measuring the Floor
Use tape measure to measure the floor area. If the bathroom is rectangle, then this step would be easy. If it isn’t, then measure the area of all rectangles and count the total. Usually it is recommended to add 10% extra tiles to adjust for breakage, cutting and wastage but the more complex design your bathroom floor has, the more tiles it would consume. So, it is better to buy a little extra to avoid the headache of buying few more tiles in case you need them later.
Prepare the Area
Definitely you don’t want to create a mess and damage the toiler and other things like sink and vanity. So, remove things you can and cover everything else. Thin set is easy to remove when it is wet but once it gets dry, it would hard to remove from toilet or sink so better safe than sorry.
Use abrasive pads to clean the floor. Make sure there is no dirt left there. If the floor it too smooth, it won’t hold tiles so you need to use combination of sand paper and abrasive pad to make it a little rough and dirt-free.
Apply Thin Set
Install Tiles
Install tiles when the thin set is still wet; if you are doing it for the first time, you would definitely get some thin set on tiles. This is not a big deal and you can remove it easily with sponges when it is wet. If it dries out, it would be difficult. The drying process could take many hours (up to 24 hours) so wait patiently.
Apply Grout and Sealer
Put some grout on the newly installed floor and use sponges to spread it out so it can cover the gaps between tiles. Grout is not as hard as thin set and you can make it thinner by adding water. After filling all the gaps, remove the excessive grout with the help of sponges and cheesecloth. Grout usually takes 48 to 72 hours to dry completely and after than you can apply the sealer for water resistance.
Some Tips About Tiling a Bathroom Floor
As mentioned above, if you are confident and have enough patience, you can tile the bathroom floor yourself; however, in most of the cases you need professional help to do things perfectly. Following are some tips about tiling a bathroom floor that can help you in DIY projects.
Attention to Details
Tiling the bathroom floor is a work of precision and you should understand that small details make a big different. Attention to details would give your bathroom floor a more polished look than normal.
Tile Size
People usually think that a one foot tile would be exact 12 inches but that’s not the case. Tile manufacturers consider the space between tiles before naming them one foot tile so it would be slightly lesser than 12 inches. If you are planning to tile the bathroom yourself, ask the store for a tile sample and measure it precisely to get the idea of actual sizing.
Doors and Windows are the Weakest Links
You need to ensure tiles are sealed perfectly and water cannot go behind the tiles. Unfortunately, it is easier said than done because doors and windows make it extremely difficult. The process of waterproofing doors and windows might take some extra time and efforts but it would increase the life span of the job drastically.
Water Drain Level
Depending on the exact position of the drain in your bathroom, you need to adjust tiles for water drain level. Smooth water flow in the right direction not only reduces the overall dry out time after shower but also increases the durability of tiles and grouting.
Remove Sanitary-ware if Possible
You can install tiles around sanitary-ware but it is recommended to remove everything you can before tiling because of three reasons; first of all, during the tiling process, they could get damaged and you would be unable to concentrate on the world while avoiding possible damage all the time. Second, removing the sanitary-ware would allow you to make a much more better finish. And last, an easily removable sanitary-ware would ensure the replacement easier any time in the future.
Choose Adhesive Carefully
Always ask the store for the recommended adhesive for the tiles you’ve chosen. You can select either ready-made adhesive or powder based one. However, powder based adhesives are more popular because you can control the water ratio and thickness of the solution as per your requirements.