
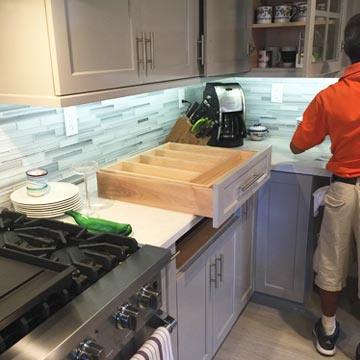
The best way to increase the overall value of your house is to upgrade your kitchen and bathroom. Contrary to popular belief, you don’t have to spend a hefty sum of money to make your kitchen aesthetically pleasing. Unlike tile flooring, you don’t even have to move appliances and cabinets for backsplash installation. Let’s see how it could be done, what tiles to choose and some amazing tips about backsplash installation.

Step 1: Getting Suitable Tiles
Of course the first step of installing backsplash is getting suitable tiles for your kitchen. Once you are in the tile showroom, you would see lots of different types of tiles and so many options would confuse you. It is better to prepare yourself before visiting the store. The salesperson can help you there but they don’t know what you want better than you do.
- Some of the factors that distinguish different types of tiles and can help you choose the most suitable tiles for your kitchen are: cost, durability, installation process, color availability, water resistance, cleaning process and
Let’s take a look into different types of backsplash tiles.
Ceramic
Ceramic tiles cost almost $2-$6 per square foot. This is the most common type of backsplash tiles and the reason behind its popularity all over the globe is cost efficiency, durability, a wide range of available colors and designs and the installation process which is pretty easy. However, it is difficult to get the exact color match in two different batches of Ceramic tiles.
Porcelain
Porcelain tiles are quite similar to ceramic tiles when it comes to pricing and manufacturing process except Porcelain tiles are made at a much higher temperature. It offers all the benefits of ceramic tiles and because it is more dense and has less pores, Porcelain tiles are impact resistance and easy to clean. However, because they are less porous, Porcelain tiles need special material for setting.
Glass
Glass tiles are considered the most expensive and most classy ones among all. Usually they cost around $7 to $30 per square foot. Glass tiles are colorful, easy to clean, excellent water resistant and shiny. As you can anticipate, glass tiles are very difficult to install and without experience and expertise, it is impossible to install them perfectly.
Cement
Cement tiles are also known as Cuban tiles in many parts of the world and usually these are handmade. The best thing about Cement tiles is their beauty and rareness as they can give your kitchen a classical look. However, because they are rare, not every tile installer has expertise in working with them. Cement tiles cost around $6 to $17 per square foot. Also, Cement tiles need periodic sealing every few years.
Stone
There are many different types of Stone tiles and their prices vary from $6 to $15 per square foot. The best thing about Stone tiles is their luxury looks. However, these tiles are not durable and could be damaged easily with water, acidic elements and detergents.


Step 2: Gather the Equipment and Material
Now you have selected the desired tiles, it is time for gathering the equipments.
- Level
- Tape measure
- Multiple buckets
- Sponges
- Notched trowel
- Tile cutter
- Knife
- Mixing paddle
- Mortar, sealer and grout (based on the type of tile you selected)
- Tile adhesive
Step 3: Measure the Area Carefully
Measuring the backsplash area is quite easy if you do it carefully. You would be lucky if the area is perfectly rectangular but in most of the cases, it doesn’t happen. If the area is rectangular, then simply measure the length and width of the area and by multiplying, you get the total area. For example, if the length is 15 feet and width is 3 feet then the total area would be 45 square feet.
If it is not perfectly rectangular but a combination of multiple rectangles then measure the area of each of them separately and their summation would be the total area. You can get help from backsplash installation services in Los Angeles
Step 4: Set up the Area and Wall
Regardless of how carefully you do things, you would be making a mess and that’s why it is important to cover everything else near the backsplash installation area. First of all, remove the electric outlets, switches, lights, cover countertops, cabinets and cover other things near the area. You can use cardboards for covering. Now, you need to prepare the wall; if there are signs of damage, scratches and holes, you need to fill them because the uneven surface can result in uneven tiles.
If the surface is too smooth and shiny, you need to sand it so it can grip the tiles. Make sure the surface is dirt free, oil free, there is no debris and the wall is not greasy. Based on what you apply on the wall, ensure it is perfectly dry before you move to the tile installation part.
Step 5: Apply the Mortar
There are two types of mortar; you can either get powder or pre-mixed solution. The pre-mixed solution is usually good for lighter tiles yet professionals prefer powder option so they can control the density based on the type, size and weight of the tile. After readying the mixture, apply the mortar on wall with flat side of the notched trowel. After that, apply another layer with the notched side of the trowel to create edges. These edges help in holding tiles tightly.
Make sure the mixture covers the wall completely and depends on your speed of applying the mortar only apply on 2-3 square foot area so you can apply tiles before drying out.
Step 6: Tile Installation
Start installing tiles from the main focal point; for example, in kitchen, the main focal point of backsplash is behind the sink. However, it may vary depending on the design of your kitchen but that’s the general rule. Press the tile on soft mortar and meanwhile slightly rotate it in both directions so it can hold the surface. After installing the tiles, check all of them and if there is mortar on a tile, remove it as soon as possible before it gets dry.
Usually the drying process takes 8 hours but the recommended time is 24 hours. This may vary based on the temperature and overall climate but 24 hours are enough in most of the cases.
Step 7: Apply the Grout
You can either buy a pre-mixed grout or make it yourself with powder. Making grout with powder is easy too; you need to add enough water (as per instructions) and mix it well. Ensure to re-mix the solution every 20 minutes or so to maintain the consistency of it. The grout would be applicable within 2 hours of mixing so it is reasonable to prepare small amount of it each time.
Apply the grout and ensure all the spaces between tiles are filled completely. Remove the excessive grout from tiles with cheesecloth but do not damage the grout inside the spaces. Don’t worry about tiles; after the grout dries out, you can clean the tiles with water and cheesecloth.
Step 8: Apply Sealer
Different types of sealers are applied on different types of backsplash tiles. Wait 72 hours for the grout to dry out completely and apply the sealer based on the instructions written on container.