Comparison Between Different Tile Cutting Methods

Comparison Between Different Tile Cutting Methods

Comparison Between Different Tile Cutting Methods

The process of tile installation is not that difficult on its own as all you have to do is apply the thin set and place the tile at its predefined place but there are lots of other things for example selecting the best tile for the application and tile cutting process that might need professional help if you are not willing to do it yourself. There are many different ways to cut tiles and each of them has its own benefits (and flaws too). Even if you use the simplest possible tiling layout for easiness, you still have to cut tiles in corners and to fit smaller pieces in smaller spaces.

Lets talk about different tile cutting methods which tile installers in Los Angeles use.

Wet Saw

Wet saw is the most common method of cutting tiles; the equipment consists of a saw with diamond blade, powered by electric and water is used to cool down the blade so you can use it for extended time period. There are different types of wet saw that are used for straight cutting, edge cutting and to make L shapes. However, the whole equipment is pretty expensive for a weekend project and it is mainly used by professionals because they use it frequently.

Divi WordPress Theme

People who want a tile cutter for one-time project usually opt for other much cheaper methods. If you want to buy a wet saw for tile cutting, keep the safety at your first priority as some newer models offer lots of safety features.

Grinder

Using grinder to cut tiles is similar to using wet saw except a few differences; for example, first of all, there is no water involved. You can manually put water on the blade to cool it down though. Another major difference is the structure and method itself; in case of wet saw, the equipment stays at its place and you move the tile but in case of grinder the tile stays at its position and you move the grinder. Using grinder to cut tiles is usually considered a shortcut or a backup plan where you can use the grinder manually in case no other thing (like wet saw or pliers) is available.

Tile Nipper

Tile nipper is quite similar to pliers with thick edges so you can grab the tile and put force with other hand to cut it. Tile nipper is a common method among people who do DIY tile installation projects and need something effective and cost efficient. You can get a decent tile cutting pliers at a fraction of the cost of a wet saw. However, unlike other methods, tile nipper does not exactly cut the tile in two pieces but it breaks the other part.

For example, if you want to use ¾ of a tile then the other ¼ piece would be lost during the process. As you can handle the force, layout and everything manually while using tile nippers, they are mainly suitable for cutting edges or give tiles specific shapes.

Score Tile Cutter

Score tile cutter can cut tiles in two pieces and the method is fairly simple so you can learn it in few minutes. All you have to do is line up the mark on tiles using a scoring wheel, put the other end of the scoring wheel exactly under the tile where you marked it and snap. Do not mark the tile multiple times and try to do it in one try because marking the tile multiple times would damage the tile and scoring wheel itself.

Horizontal vs Vertical Bathroom Tiles: Which One You Should Choose?

Horizontal vs Vertical Bathroom Tiles: Which One You Should Choose?

Horizontal vs Vertical Bathroom Tiles: Which One You Should Choose?

People renovate their kitchens and bathrooms for different reasons; some people want to have new look for their kitchen or bathroom while some people only remodel them before selling the house – to increase its market value. Although there are many types of tiles when it comes to layout however the two most popular ones are square tiles and rectangular tiles. When people select rectangular tiles for their space, they wonder whether it would be suitable to lay them horizontally or vertically.

This is a common dilemma that happens because we see both of these styles all the time. In public bathrooms and other places, horizontal and vertical both tiles are used. Horizontal and vertical tiles have a huge aesthetic difference and designers use them strategically in different types of spaces. The popular belief is horizontal and vertical tiles make the space look bigger and this is true to some extent. Of course they don’t make your kitchen or bathroom physically bigger but it is more like an optical illusion.

What Happens When You Use Tiles Horizontally?

Actually tiles are not horizontal or vertical, they are just rectangular and you can use them either way. So, there is not any structural difference between both. Horizontal fitted tiles can make your kitchen or bathroom look wider. This layout is particularly suitable for tall yet smaller bathrooms and kitchens. Because of this specific layout, the space looks visually open, wider and bigger in both dimensions (Width and depth, not height).

In our experience, the horizontal tiling visual illusion only works with reasonably sized tiles instead of larger ones. Also, you can enhance the illusion by using mosaic or a color contrast combination. Using smaller tiles, you would be using lots of joints that would create the illusion of a wider space as our brain cannot perfectly process the depth. The following video is a good example of what horizontally stacked 3″ x 6″ porcelain tiles look like using a 1/16″ grout joint.

What Happens When You Use Tiles Vertically?

Using tiles vertically is quite similar to using them horizontally in terms of creating optical illusion but it works exactly the opposite way. This tiling layout is specifically suitable for wider kitchen and bathroom space with relatively less height. This usually happens in houses where the owners decide to skip the expense of removing the old tile floor and decide to lay the new floor on top of it.

Divi WordPress Theme

This practice reduces the height of the bathroom which is not exactly a big concern on its own but to make the kitchen or bathroom look aesthetically pleasing, it is better to use rectangular tiles strategically. When you install tiles vertically to for the optical illusion of making your bathroom or kitchen taller, use larger tiles instead of smaller ones (like we did in horizontal tiling case) because lesser joints would make things look congested.

What Are Some Other Popular Tiling Layouts?

Tile installation in Los Angeles is a modern and innovative industry where we experiment with new things regularly to discover new gems. The Following are some other popular tiling layouts that can help you make your kitchen or bathroom space aesthetically pleasing.  Note, if you want to learn see a more exhaustive list of tile patterns, check out this exhaustive guide.

Brick

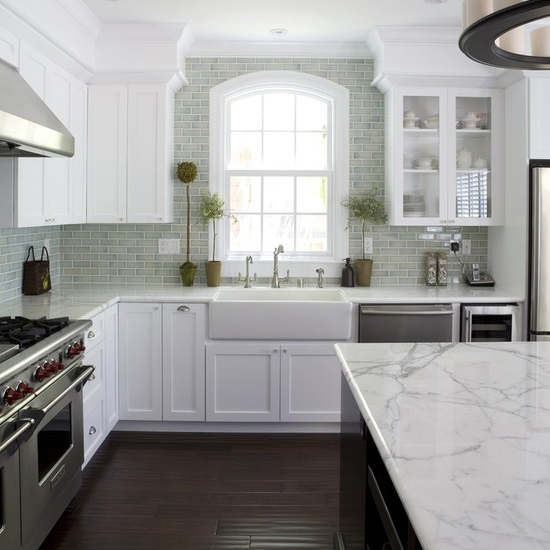
Brick layout has been a popular layout for decades and as you can imagine its name came from the classic brick wall design where each brick is set on two other tiles (divided 50-50). There are some variations in this layout yet classic brick layout is suitable for any kind of bathroom or kitchen space. The brick pattern is mainly used horizontally but you can also use it vertically to make the room look taller.

Usually the brick layout works better if you use a contrast grouting to emphasize the division between times. If you want something bold, exotic and interesting, you can use multiple colors and textures to give the wall a modern and abstract look. However, the design of the bathroom or kitchen must be compatible with the architectural style of the house.

Oversize Tiles

The price of tiles per square foot increases with the size of the tile because the manufacturing process of larger tiles is more difficult than the smaller ones. Using oversize tiles in a bathroom or kitchen can give the space a seamless look. Usually smaller grout joints no larger than 1/16″ and as small as 1/32″ are used. Also, unlike your standard brick layout, it is suitable to use matching color grout as opposed to darker color grout for contrast. Although this layout is good for any kind of tile, it looks great with stone tiles, stone or porcelain slabs, or large format porcelain tiles.

Mosaic

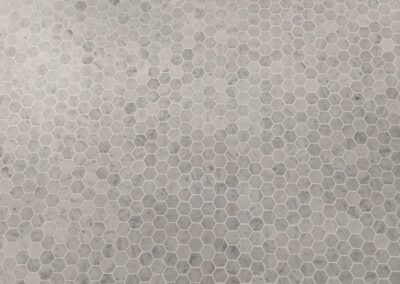
Usually mosaic refers to lively patterns with exotic and complicated colors and textures but in tiling industry mosaic refers to smaller tiles regardless of their texture and colors. These tiles are so small (1 by 1 inch is a typical size) that is very difficult, expensive and time consuming to install them one by one so they come on sheets. There are thousands of permutations of mosaic tile colors, textures, tile size and sheet size. Some tiles even come with patterns that can make your bathroom or kitchen space come alive.

Herringbone

Herringbone is a relatively newer tile layout but it roots go back to hundreds of years when this pattern was used in making brick roads. This layout is achieved by putting tiles diagonally, quite similar to brick layout but the pattern is more uniform and sophisticated. Unfortunately, you need extra cutting to make the edges compatible with each other that mean the cost of tiles would increase.

However, Herringbone looks great with every type of tile and you can use this pattern on bathroom walls as well as bathroom or kitchen floor. Just like the brick pattern, you need to use a high contrast grouting to pop up the tiles and give them a modern look.

Basket Weave

Basket Weave is not a popular pattern as others mentioned above but it is worth mentioning here we it is a bold design that a small percentage of people might like. The idea behind this particular layout is to use rectangular tiles to form square tile pattern. Like every other sophisticated tile layout, basket weave also needs contrast grouting in order to emphasize on the pattern itself.

What’s All The Fuss About Hex Tile? How to Creatively Use Them

What’s All The Fuss About Hex Tile? How to Creatively Use Them

What's All The Fuss About Hex Tile? How to Creatively Use Them

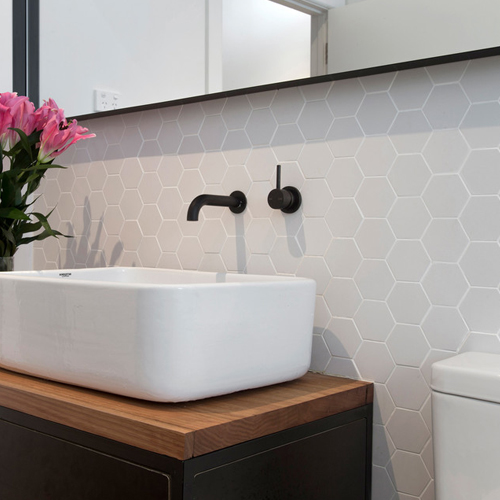
Hexagon tiles which are also known as hex tiles have been getting popularity all over the globe. These tiles are used in mostly bathroom remodeling in Los Angeles however you can use them effectively in kitchen remodeling jobs too. Like other shapes (rectangle, square and triangle) hex tiles are also available in lots of colors, materials and sizes. Considering using hex tiles in bathrooms is a newer concept, you can remodel your bathroom with hex tiles to give it a modern look that would help in selling the house if that’s your plan.

Tips about Using Hex Tiles in Bathroom or Kitchen Space

Let’s see how you can use hex tiles effectively to make your bathroom more attractive.

Add Texture

If you think your current bathroom or kitchen space is kind of boring then hex tiles can help you there. Interestingly, triangular tiles were introduced to send a bold message and now hex tiles have adopted that job. Using hex tiles with contrast grouting can help the layout pop and make an impression. This particular design looks like a textile design and add textures in the bathroom space.

Use Multiple Designs

Unlike other tile shapes like rectangle and square, hex tiles are pretty tolerant when it comes to using multiple designs at a single wall or floor. As mentioned above, hex tiles come in many colors and you can mix and match different colors for a modernized design. For example, you can use the same color with different tones or you can even use contrast tiles for an abstract design.

Don’t be Shy

Unfortunately, many people think that hex tiles are only associated with bathrooms and kitchens. It is unreasonable assumption as all other shapes like bricks, rectangles, square and triangles are used everywhere including countertops, backsplashes, floors and walls. Hex tiles should be used more often regardless of the application if the design space allows. You can use hex tiles anywhere you want including stair walls or floors.

Color Splash

Hex tiles allow the home owners to do lots of experiments with colors. You can mix colorful hex tiles with a single wall made of single color tiles. This specific design idea can help you beautify kids’ room without spending ridiculous amount on tiling and flooring. Even few colorful hex tiles in the boring design space can make the design pop. However, don’t forget to balance the use of different colors and it is recommended to use a pseudo random color formation.

Divi WordPress Theme

Create Drama

Hex tiles are not linear as square tiles or rectangular tiles; if you use different tones with matching grouting, it is possible to make a bold statement by making the entire wall with hex tiles. As square and rectangular tiles could be used at a single space to give it a varying effect, the same could be done by using hex tiles with square tiles or rectangular tiles. For example, you can use hex tiles on an entire wall and use rectangular or square tiles for flooring.

How to Install Hex Tiles?

It is with no doubt that hexagon tiles look good in any kind of space whether a room, kitchen or bathroom. However, these tiles need more careful installation than other shapes like square or rectangle because they have more sides. Considering you are spending a hefty sum of money on kitchen or bathroom remodeling, it is recommended you hire a professional for this sort of tile installation especially if you don’t have any experience in tile installation. Let’s see how you can install hex tiles properly.

First of all, you need to clear the space; removing the old floor is half the job so don’t take it lightly and consider this too while setting a budget for the tile installation job. If the old flooring hast not already removed or you are installing tiles for the first time then you need to make sure the substrate is absolutely flat and level. If you have even the slightest imperfection in the floor, the hexagon tiles will accentuate this and the finished floor will look wavy. A good analogy is this.  What would the finish floor look like if you had to tile a ball?  Unlike square and rectangular tiles that could be installed in corners without any nipping, hex tiles need to be cut perfectly for the corners.

You can use a tile nipper, wet saw, or manual cutter to cut tiles and make them compatible with the corners but we recommend a higher end wet tile saw or high end manual tile saw like a Montolit. Once you install the first few tiles in the corner, the rest is a pretty straightforward job. Bigger hexagon tiles come individually and require you install them individually while smaller hexagon tiles come in mesh sheets just like mosaic tiles. These mesh sheets require patience to work with but if you follow a few simple tips, your floor will look amazing.  Remember, one mistake in the installation of a hexagon mesh sheet will destroy the entire installation.

For starters, hexagon mesh sheets should never be laid in a grid pattern.  They should be laid using a 1/3 offset to minimize the final grouted floor to appear as individual mesh sheets as opposed to a cohesive hexagon floor.  Ensure you step back and look at each mesh sheet after it is installed.  Ensure you are using a laser and/or level to keep the tiles in square.    Use a properly sized trowel!  An improperly sized trowel will make your life a living hell as you will have too much thin-set mortar on the floor causing it to squeeze through the grout joints as you tamp down the mesh sheet.  Lastly, be patient during the installation process. Hexagon tiles, with their intricate patterns, may require more attention to detail. Take your time aligning each sheet, adjusting as needed, and double-checking the spacing. This meticulous approach will pay off in the end, leaving you with a beautifully installed hexagon tile floor that enhances the aesthetic of your space.

When tiling, use a high quality thin-set.  We recommend and only work with Laticrete based thin-sets.  If you are going to your local biog box store, chances are, you are not going to find a good thin-set.  There are essentially two types of thin-set mortars in the market; pre-mixed and powdered form. It seems the pre-mixed mortar is an easier option but professionals prefer powdered form so they can control the density of the mixture. While mixing thin-set mortar, do not make lots of it at once because it gets dry very quick and once hardened, it is useless.

After installing all the tiles, it is recommended to give it a few hours to dry.  After that you can start applying grout. Usually contrast grouting looks better with hex tiles but there is no hard and fast rule so you can select any color of your preferences. Based on the grout joint between the hexagon tiles, you can apply a sanded, non-sanded or epoxy based grout – both of these types are easily available in the market. Sanded grout is good for larger grout joints while non-sanded grout is thin and suitable for smaller grout joints. When you are unsure, check the manufacturers instructions for grout compatibility. After applying the grout, you can clean the excessive grout with sponges and micro-fiber towels. Give the grout ample time to dry and then you are good to go. As always, drying times depend on several factors and you should always refer to the manufactures instructions.

Porcelain vs. Ceramic: Which Tile is Suitable Where?

Porcelain vs. Ceramic: Which Tile is Suitable Where?

Porcelain vs. Ceramic: Which Tile is Suitable Where?

There are many different types of tiles like ceramic, porcelain, stone, glass and others. Unlike others, porcelain and ceramic have many similarities but still they are two different types of tiles and based on your application one might be more suitable than the other one. Interestingly, ceramic and porcelain tiles are not only made with different types of clay but they are also manufactured on different temperature.

Porcelain is treated with significantly higher temperature than ceramic and that’s why it is more solid, less porous and less water absorbing than ceramic tiles. The main difference between ceramic and porcelain tiles is their ability to absorb water. A tile is considered porcelain (actually they are not made of porcelain but it is a given name) if it absorbs less than 0.5% of water. Let’s see how this attribute makes a big difference and which tile is suitable where.

Which Tile You Should Use if You Are Under Tight Budget?

Now that’s a trick question as different ceramic and porcelain tiles come with varying price tags. However, if you compare them side by side, porcelain tiles are always more expensive than ceramic tiles. So, if you are under a tight budget, then using ceramic tiles would be a smarter decision. It is almost impossible to find a porcelain tile with high quality and less than $3 per square foot price tag. The price goes up and easily exceeds $6 per square foot limit when it comes to porcelain tiles.

On the other hand, ceramic tiles are significantly cheaper as you can find a good quality ceramic tile for $3 per square foot and even the most premium ones are available for $4 per square foot. If quality if not the high priority here, you can find ceramic tiles for less than $2 per square foot. If you are compromising on the quality, it doesn’t mean you have to compromise on the design too. There are hundreds of different designs available in ceramic tiles and you can even choose latest trends like wood-like tiles to give your kitchen space a modern look.

Which Tile You Should Use Outdoor?

That’s pretty simple; porcelain must be your first and only option outdoor especially if the temperature goes below freezing point in winters. As mentioned earlier, ceramic tiles are porous that means they absorb water that means in freezing environment tiles would absorb water that would expand and break the tiles. In some harsh conditions, ceramic tiles won’t even last a single night outdoor.

Divi WordPress Theme

Even if it is not freezing outside, ceramic tiles wouldn’t be a good choice because they would have to bear lots of water contents that would reduce their overall lifespan. Generally, outdoor tiles get more foot traffic than indoor tiles so using ceramic outdoor would be a bad idea from this prospective too.

Which Tile You Should Use if the Application has High Foot Traffic?

Both of the tiles (ceramic and porcelain) are suitable for high foot traffic applications like living rooms and hallways. However, if you are looking for the best option (considering other factors as well) then porcelain should be your first choice as these tiles are much denser and durable as compared to ceramic tiles. The high density of porcelain tiles not only makes them stronger but also makes them scratch resistant and wear resistant – both of these attributes are highly important in applications with high foot traffic.

Many area of the house are considered high foot traffic areas; for example, living room, hallway, kitchen (if social and family gathering is a common practice) and might be some other areas depending on the kids and pets. It is recommended to use porcelain in those areas to increase the durability of tile installation.

Which Tile You Should Use If the Tile Installation is A DIY Project?

Many people would be wondering that why being a DIY project is an influential factor in deciding which tile should be used. The reason is quite simple; if you are not a professional tile installer, then it would be a nightmare for you to install porcelain tiles. As mentioned earlier, porcelain tiles are much denser than their counterpart yet being denser also has some disadvantages. For example, porcelain tiles are difficult to cut and difficult to install on walls.

It would be even more difficult in applications where you need to cut lots of tiles for corners and to meet the space requirements. If you use porcelain tiles in such situations, either you would need professional help or you would break lots of tiles in the process that would ultimately increase the cost.

Which Tile You Should Use if the Application has High Humidity and Moisture?

That’s an easy one; porcelain should be your first choice if the application has high moisture. That includes bathroom, kitchens, outdoor applications and even laundry room. Porcelain is dense and the high density makes it impossible for water to penetrate the tiles. As mentioned above, the water absorption rate of less than 0.5% is considered pretty impressive. Many home owners use ceramic for these applications as well because ceramic is significantly cheaper than porcelain.

Those people are not entirely wrong as ceramic tiles come in many different water absorption ratings; tiles with less than 3% of water absorption rate are still considerably fine with water-rich applications. There is another smart solution; you can use porcelain as backsplash in kitchen and other tiles could be ceramic tiles. This layout would reduce the overall cost drastically.

We have discussed five different scenarios where you might get the dilemma of using ceramic or porcelain tiles. And hopefully now you understand the key differences between both tiles and their different uses. By the way, both types are easily cleanable with sponge or mop.