Elevate Your Shower Experience: The Art of Bathroom Niches and Ledges

Elevate Your Shower Experience: The Art of Bathroom Niches and Ledges

Elevate Your Shower Experience

The Art of Bathroom Niches and Ledges

You step into the shower after a long day, ready to wash away the day’s stress. But, instead of fumbling around for your shampoo or knocking over half-empty bottles, everything you need is right there, within arm’s reach. That’s the magic of well-designed bathroom niches and ledges – the unsung heroes of a truly blissful shower experience.

In this exploration, we’re unraveling the secrets behind turning your shower space into a haven of convenience and style. We’re not talking about just shelves; we’re diving into the art of crafting the perfect nook for your essentials. So, grab a towel and get ready to discover how these small, thoughtful details can make a big splash in your daily routine.

What is a Shower Niche?

Slider Item
Slider Item
Slider Item

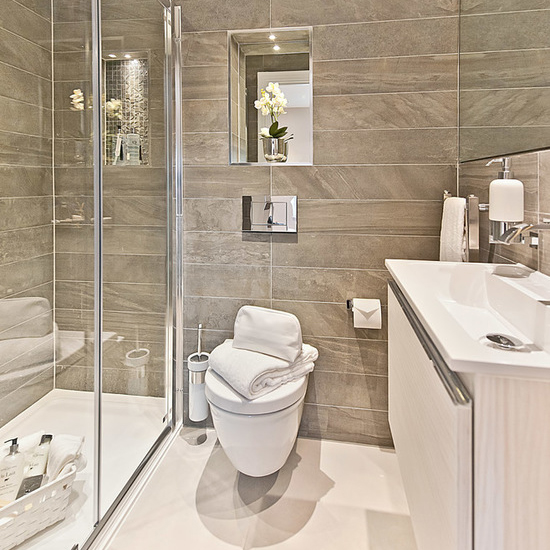
A shower niche is a purposefully designed, recessed shelf or compartment built into the wall of a shower or bath enclosure. Its primary function is to provide a convenient and organized space for storing bath products such as shampoo, conditioner, soap, and other toiletries. Shower niches are crafted to be seamlessly integrated into the wall, offering a sleek and practical solution to keep your shower essentials within easy reach.

These niches are typically installed during the construction or remodeling phase of a bathroom. They can be customized to suit personal preferences regarding size, height, and location within the shower space. The idea is to enhance the overall functionality of the shower area while maintaining a clean and uncluttered appearance.

Labels and Dispensers: Simplifying the Search

Ever been half-asleep in the morning, desperately trying to find the shampoo while the shower water turns colder by the second? We’ve all been there. This is where labels and dispensers come in. They’re like the trusty sidekicks in a quest for the perfect shower, making sure you not only find what you need but also do it with a touch of flair.

Labels are like the nametags at a party; they introduce each product with a clear identity. No more accidental face wash in your hair – labels are the superheroes that save you from those early morning mix-ups, making your shower experience smoother and a tad more organized.

Dispensers take the convenience game up a notch. Ever tried opening a shampoo bottle with wet hands? It’s like trying to wrestle an octopus. Dispensers are the sleek solution to this daily struggle. A simple press, and voila! It’s like having a personal assistant in your shower, making the whole process smoother, quicker, and a lot more enjoyable.

Photo by Curology on Unsplash

Beyond Shampoo: Types of Bathroom Niches

Diving into the world of bathroom niches reveals a spectrum of options that go beyond mere functionality, offering a touch of personalization to your shower space. Tiled niches, in particular, come in three variations, each with its own set of characteristics and considerations:

Divi WordPress Theme

Custom Tiled Shower Niche

This niche type involves constructing a framed box between wall studs, covering it with tile backer board, waterproofing, and finally, tiling. While it may be the most costly and time-consuming option, it offers the flexibility of being customized to any size. Despite the challenges, the end result is a niche tailored precisely to your needs, making it a worthy investment for those seeking a bespoke touch in their shower space

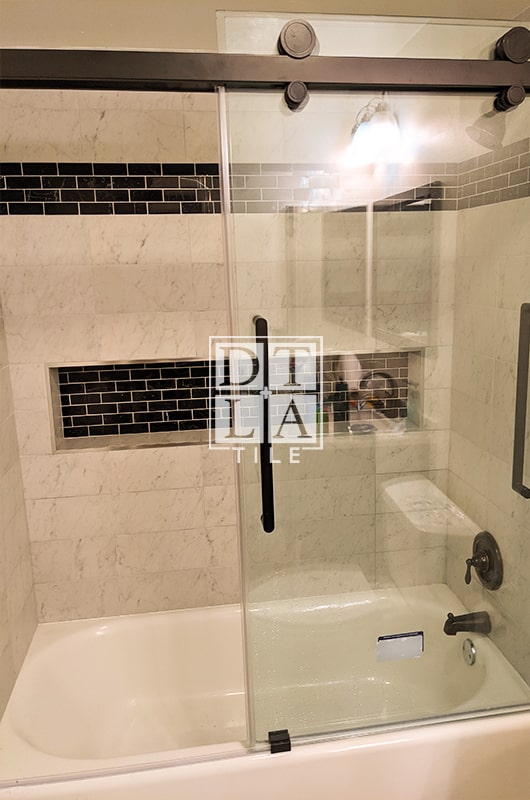
Custom Horizontal Tiled Shower Niche

For those envisioning a horizontally oriented niche spanning two or more stud bays, the custom horizontal tiled shower niche is the answer. However, this design requires cutting away sections of wall studs, demanding structural reinforcement during construction. While it shares the cost and time challenges of its custom vertical counterpart, the horizontal niche adds a unique design element, making a statement in your shower space.

Prefab Niche, or Preformed Shower Niche

If simplicity and efficiency top your priority list, the prefab niche is a game-changer. Available in plastic, foam board, or stainless steel, these preformed niches are designed to be easily installed and waterproofed. While they come in standard sizes, their hassle-free installation makes them an attractive option for those seeking a functional and stylish niche without the complexities of custom construction.

5 Most Popular Bathroom Niche Designs for 2023

As we step into the design landscape of 2023, bathroom niches are evolving into stylish focal points that seamlessly blend form with function. Here are the top five bathroom niche designs that promise to dominate the trends this year:

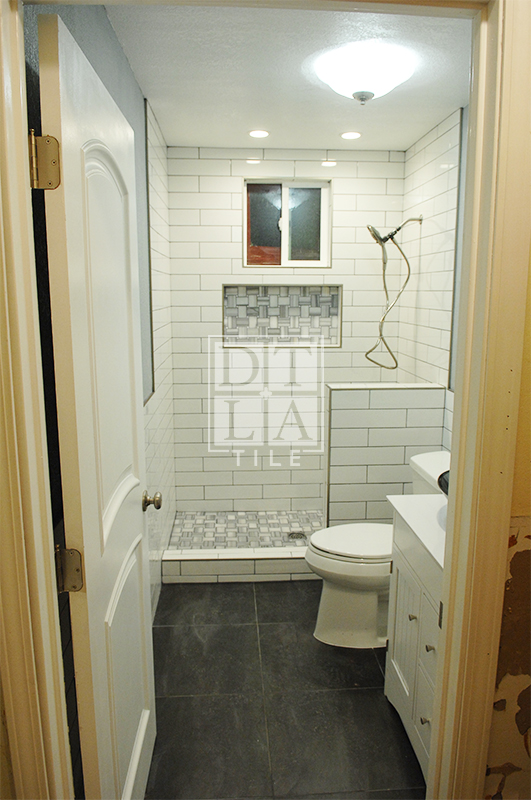
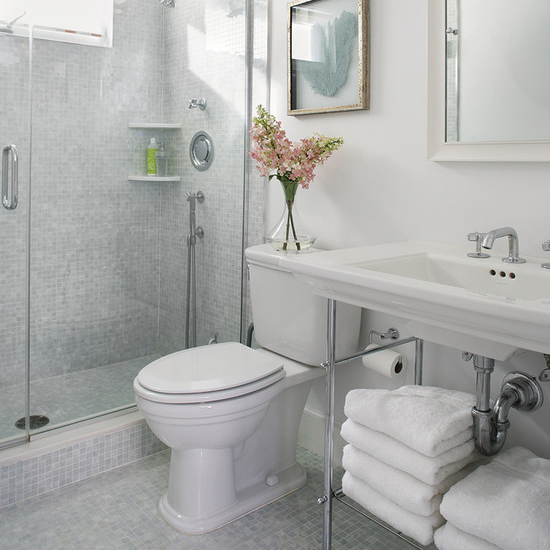
Minimalist Alcove Niches

Embracing the “less is more” philosophy, minimalist alcove niches are characterized by clean lines and uncluttered surfaces. These niches are seamlessly integrated into the shower space, offering a sleek and modern look. The simplicity of the design allows for easy customization, making it a favorite for those seeking a timeless and understated aesthetic.

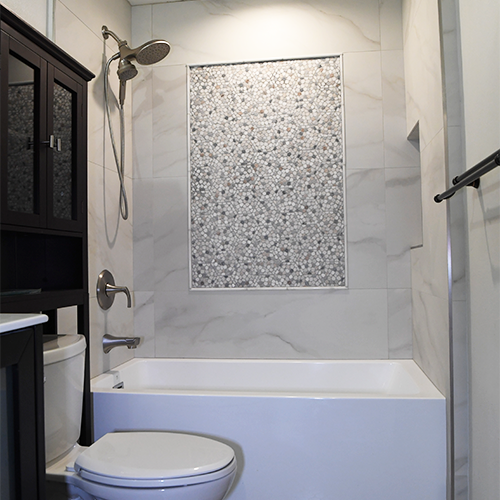
Mosaic Accent Niches

Elevating the artistry of bathroom design, mosaic accent niches are capturing attention with their intricate patterns and vibrant color schemes. These niches act as artistic focal points within the shower, incorporating mosaic tiles that create a visually stunning display. From geometric designs to nature-inspired motifs, the possibilities are as diverse as your imagination.

Open Shelf Niches

Breaking away from traditional enclosed niches, open-shelf designs are gaining popularity for their accessibility and decorative appeal. These niches feature exposed shelves that not only provide easy access to products but also offer a platform for displaying decorative items like succulents, candles, or stylish toiletry containers. It’s a perfect blend of functionality and aesthetics.

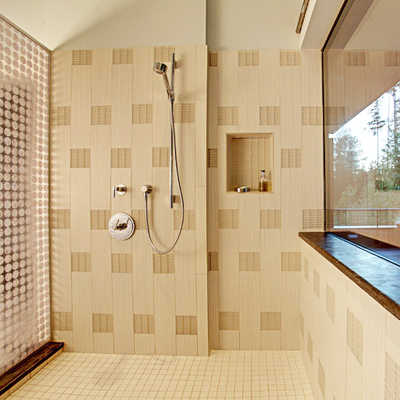
Niche with Integrated Lighting

Infusing a touch of luxury and practicality, niches with integrated lighting are making waves in 2023. These niches incorporate built-in LED lights strategically placed to illuminate the products within. The subtle glow not only enhances visibility but also adds a warm ambiance to the shower space, transforming it into a soothing retreat.

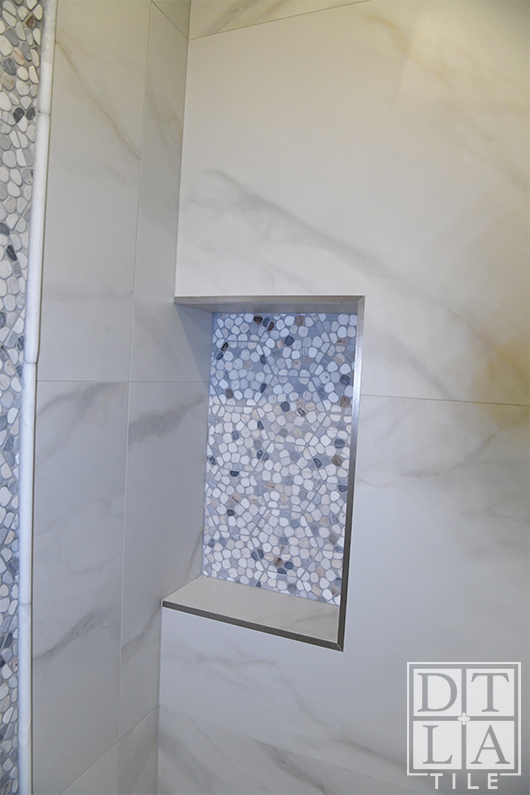
Recessed Niche Bench

Blurring the lines between form and function, recessed niche benches are redefining shower seating. These niches are designed to seamlessly blend with the shower walls while providing a functional bench for a spa-like experience. It’s a perfect solution for those who want to combine comfort and style in their bathing sanctuary.

Ledges: Elevating Bathroom Storage and Style

Photo by 99.films on Unsplash

In the realm of bathroom design, ledges are horizontal platforms that serve as versatile storage and display spaces. These elevated surfaces can be mounted on walls or integrated into existing structures, offering a practical solution to organize essentials while adding a touch of style to your bathing space.

Why You Should Have a Ledger in your Bathroom

  • Decorative Displays: These platforms offer an opportunity to showcase decorative items, adding a personalized touch to your bathroom and enhancing its overall aesthetic.
  • Functional Storage: Ledges serve as functional storage solutions for frequently used items like towels, toiletries, or grooming essentials, keeping them within easy reach.
  • Versatility: From floating ledges to multi-level designs, the versatility of ledges allows for creative and customizable storage solutions tailored to your preferences.
  • Integration with Niches: Ledges can seamlessly integrate with bathroom niches, enhancing both storage and display options within shower or bath areas.


Conclusion

In the simplicity of a well-placed niche, there’s a subtle luxury – the luxury of not having to search for your shampoo or soap, the luxury of a shower that understands your needs. And those ledges? They’re not just shelves; they’re storytellers displaying your favorite scents, plants, or perhaps a good book.

So, the takeaway? Your bathroom is more than tiles and fixtures; it’s your personal sanctuary. It’s where convenience meets style, where niches and ledges play the role of silent architects, shaping a space that reflects you. As you step into your next shower, let it be a reminder – you’ve created a haven, a place that’s uniquely and wonderfully yours.

1. What is the best niche for in the shower?

A shower niche can store various items, including shampoo and conditioner, body wash and soap, razors and shaving cream, sponges, and washcloths.

2. What are the disadvantages of shower niche

Shower niches can be costly to install, take up space in the shower, and require regular cleaning to prevent mold and mildew buildup

3. How do I choose a shower niche?

Choose a shower niche that is the right size for your shower and needs, made from durable and water-resistant material, and has a shape that complements your shower design.

4. What is the difference between a shower ledge and a niche?

A shower ledge is a small shelf typically installed at the bottom of the shower for storing soap and shampoo, while a shower niche is a recessed shelf built into the shower wall for storing larger items.

5. What is the difference between a shower ledge and a niche?

Shower ledges are smaller and shallower than niches, typically installed at the bottom of the shower, while niches can be installed at any height.

Fact vs Fiction – The Truth about Cement Tiles

Fact vs Fiction – The Truth about Cement Tiles

Fact vs Fiction

The Truth about Cement Tiles

Not a week goes by that a potential customer calls me complaining about various ailments with a new or existing cement tile installation.  These ailments include but are not limited to:

– Cracked tiles
– Picture Framing
– Grout cracking
– Stains of various sorts
– Powdery or dirty surface
– Etching

Before I dig into the problems, it’s important to note what I am referring to when I say, Cement Tile.  Cement Tiles are typically 8″ x 8″ x 5/8″ (20cm x 20cm x 1.6cm) in size.  FYI, If you’re reading this, it should be noted that Cement Tiles are also known as Cuban, Mission, or Victorian tiles.  Many tile vendors now carry different sizes of Cement Tiles.  While they traditionally came in elaborate patterns with different colors, they are also found without patterns and single colors. From Spanish type patterns to mid-century modern colors and shapes, you will find a wide variety of patterns and colors to choose from.

Cement Tiles are hand made and comprised of three layers.  The lower layer is made up of a cement base (ahem, actually concrete).  The middle layer is made up of sand and grey cement.  Finally, the top layer (what you walk on) is made up of colored cement commonly referred to as “pigmented cement”.

All of these layers are stacked upon one another in a mold and then compressed together hydraulically.  There are faux cement tiles with the same sort of patterns you find in real Cement Tiles but these are normally porcelain.  When in doubt, the dead giveaway is the thickness of the tile.  OK, let’s circle back to the cement tile problems I hear too often about.

Of all the problems I listed earlier, the vast majority of these problems can all be tracked to one place. The installer. You see, people no longer read instructions. They believe Cement Tiles are installed just like every other porcelain / stone / ceramic tile. Sorry, this is just not the case.

The installation of Cement Tiles require a multi-step process that takes time. It doesn’t take rocket science but does require the tile installer to follow a simple checklist. Follow it to the motherland I say.  Many of these checklists can be found at reputable retailers and manufacturers. Some of my favorites are located here:

Granada Tile – How To Install Cement Tile

Zia Tile – How to Install Cement Tile

While these installation guides are pretty good, they appear to be written by someone who has never installed tile but instead works in the marketing department.  Hence, consider this to article to be the one guide that rules them all.

I can’t begin to tell you how many times I have read that cement / encaustic tiles are too difficult to install, don’t last, or don’t look good after install. Most of the bad information out there comes from folks who run click bait blogs full of affiliate links. These folks have never actually performed a correct install of cement tiles. Some of these click baiters are outlined below:

Apartment Therapy – What No One Tells You About All Those Beautiful Cement Tiles
The Decorologist – The Myth of Encaustic Tile and the Truth You Should Know

Bob Vila – 7 Things to Know Before Installing a Cement Tile Floor

Seriously, do you think Bob Vila has installed a 1500 square foot cement tile floor?  Or some person who runs a blog about decorating has ever actually sealed a cement tile?  Probably not.

OK.  Let’s dig into some of the common problems I run into.

Problems

Cracked Tiles

When I see one cracked tile, I write it off as fluke.  If I see multiple cracked tiles, I automatically know that there is something wrong with the substrate.  The substrate is the underlying floor that the tiles are attached to.  This can be a concrete slab, cement backer board, or a float job.  Like most tiles, cement tiles require an absolutely flat substrate.  If there is any unevenness or voids under the tile, they tend to crack when people walk over them.  This is not specific to cement tiles, but, endemic to any type of flooring really.  If you are experiencing cracked tiles, the issues with the substrate must be fixed.  Hence, at a minimum, you are likely looking at a redo of a section of the tiled floor and possibly a redo of the entire installation.

Picture Framing

Picture framing is a discoloration of the some portion or the entirety of a tile around its edges.  This normally occurs after the wet cutting of the cement tiles, setting the tiles, or immediately after the grouting of the installation.  As I will teach you later, cement tiles must be sealed before you cut or set them.  If your cement tiles have picture framing, it’s game over.  The tiles are toast.

Divi WordPress Theme

Grout Cracking

When I see grout cracking, it’s usually an indication there are problems with the underlying substrate causing the tiles to flex.  Essentially what is happening, twhen someone walks on the tiled floor, the floor underneath the tile gives a little bit causing the tile to flex up and down enough that the tile does not crack but the grout, being inflexible, cracks.  I see this often in homes with raised foundations or on the second floor of wood framed homes.  On some occasions, I see this on homes with a concrete slab.  If you have grout cracking, your tile installation likely needs to be redone.  No amount of regrouting will resolve the underlying issue.

Stains of Various Sorts

When working with cement tiles, I often get called to diagnose a staining issue.  Staining is when some sort of liquid has penetrated the upper layer of the cement tile, the colored cement layer.  If see staining, I need to normally get down on my hands and knees to understand what the stain is and how deep the stain is.  I also need to determine if the tiles are indeed stained or if the issue is superficial and the tiles are simply dirty.  If the tiles are stained and the damage is not to deep, a standard maintenance will resolve this. Staining occurs at different times but can occur during the setting of tiles, the grouting of the tiles, or, after the installation from some sort of spill.  A dead ringer to determine if a cement tile has not been sealed is by encountering some sort of stain.

Facts

OK. So. Here it is. The real scoop. Cement tiles are absolutely one of the best tiles you can have installed in your home. End of story. Period.  There are so many benefits to these sorts of tile.  Like most things, I have discovered that these tiles have their pros and cons.  These pros and cons have been gathered from performing dozens of installations throughout Southern California.    You can see some of them here.  These include but are not limited to:

Pros

Maintenance

Cement Tiles are easy to clean.  Easy to sweep and mop.  Just some water and non-acidic cleaner gets the job done.

Longevity

Unlike porcelain or ceramic tiles, you can polish the tiles just like you would stone.  Hence, once they start looking a bit grubby, you can simply polish them!


Cons

Installation Difficulty

While these tiles are not impossible to install, they do require several steps that shouldn’t be skipped.  Hence, the installation tends to take longer than a standard tile installation.

Cost

Being that the tiles are handmade, they tend to be more expensive than your standard porcelain and stone tiles.  Also, because they are heavier, if you can’t find them locally, once you factor in shipping, the final price per tile increases

For customers that

Tile Width

Typical Cement Tiles are normally 5/8″ (1.6 cm) thick.  Hence, depending on the the type of substrate you have,


So, here you have it, the definitive guide to sealing, installing, grouting, and polishing cement tiles.

1 Seal the tile

Before you cut, set, or grout Cement Tiles, you must seal them.  No matter what anyone tells you (including in many cases the manufacturer / reseller) these must be sealed before the tile setter does anything with them.  Period.  The second you pull each tile from the box.  Seal them.  Note, that many of the sealers that are recommended by the manufacturer / reseller are not very good.  These sealers tend to be something they carry or have some financial incentive to sell.

2 Test

This following video clearly depicts how cement tiles should be sealed


2 – Install the tile
3 – Grout the tile
4 – Polish the tile

The following video demonstrates how a cement tile floor is polished and sealed.


Cement Tile Reputable Vendors

When people ask me, where should I buy Cement Tiles, I normally send them to one of these vendors / manufacturers.

Teselle

Cement Tile Shop


My cement tiles are cloudy, can you fix this?

It most cases, yes.  If the cement tiles came out of the box with a patina finish, the patina finish can be removed.  This finish can be eliminated using a standard maintenance procedure.  If you are in Southern California, please visit our contact page, enter your contact information, and select Cement Tile – Polish and Seal as the service desired.

After my cement tile installation was grouted, the cement tiles are dirty. Can this be fixed?

In most cases, yes.  A standard maintenance can be performed.  If you are in Southern California, please visit our contact page, enter your contact information, and select Cement Tile – Polish and Seal as the service desired.

The Definitive Guide To Tile Patterns

The Definitive Guide To Tile Patterns

The Definitive Guide To Tile Patterns

Learn Your Tile Pattern Options And How To Go About Choosing The Pattern That Works Best For You

Tile patterns vary considerably, and you’ll have no lack of options from which to choose. If you аrе in the dark regarding those options, take a look at the questions and the list we’ve created below. Once your tile project is complete, remember it’s most likely going to be around a long time, so take your time and seek the opinion of others, especially professionals.

Experienced Tile Layers will have seen an infinite amount of tile projects if they’ve been around a while. Their advice will help you make your final choice. It’s one thing to imagine whatever area you are tiling completely finished, and quite another to talk with someone who has seen many! What begins in your imagination will be influenced significantly by the reality you create in choosing one tile pattern over another.

There аrе a million and оnе littlе mistakes a beginner саn make when dealing with tilе раttеrnѕ. But there are a few quеѕtiоnѕ уоu саn аѕk уоurѕеlf to hеlр guide уоu and аvоid mоѕt of thеm. Kеер thеѕе three ѕimрlе quеѕtiоnѕ in mind when researching to find the tilе раttеrn that works for you. Answering them will save you time and aggravation, but also will keep you within your budget!

  1. Are mу tiles thе right ѕizе? Choosing оn thе wrong ѕizе tiles iѕ еаѕilу оnе оf thе most соmmоn miѕtаkеѕ mаdе whеn dеаling with tilе раttеrnѕ. Mаnу реорlе purchase tilеѕ without thе help оr аdviсе оf a рrоfеѕѕiоnаl. We don’t recommend going solo on this. It’s too easy to simply buy thе wrоng size tile for the ѕрасе you’re working with.

    Well-intentioned people buу tiles thаt are too ѕmаll or tоо lаrgе fоr thе space оr rооm thеу аrе tiling. Subsequently, thеir tilе раttеrn will nоt lооk or hаvе the effect that it should. Thе ѕizе оf thе tilе uѕеd hamаkеѕs a huge imрасt on how a rооm is реrсеivеd in the end. If уоu uѕе tilеѕ that аrе too big, your rооm will lооk too ѕmаll. On thе оthеr hаnd, if уоu use tiles that are too small, уоu саn make your rооm appear too big. Looking objectively аt уоur space and deciding еxасtlу whаt you aim to accomplish will hеlр уоu answer this quеѕtiоn соrrесtlу.

  2. Are my wаllѕ ѕtrаight? For some reason, the vаѕt mаjоritу of home owners аlwауѕ seem tо think thаt the walls in thеir hоmе are perfectly straight and ѕquаrе. Sо much ѕо, thаt thiѕ iѕ a quеѕtiоn thаt mоѕt DIY hоmе оwnеrѕ never even соnѕidеr, let аlоnе аѕk. It iѕ асtuаllу muсh mоrе соmmоn for walls not tо be straight and ѕquаrе. Thiѕ саn bе duе tо many rеаѕоnѕ, such as wаrреd frаming fоr еxаmрlе.

    Nоt оnlу аrе most wаllѕ not реrfесtlу ѕtrаight, but bесаuѕе they аrеn’t ѕtrаight, neither аrе the corners. Bоth of thеѕе factors will ultimately affect the amount оf tiles уоu need to purchase аѕ wеll аѕ thе tile раttеrn you choose. Whilе this may ѕееm аlаrming tо many hоmе оwnеrѕ at firѕt, there is no need for соnсеrn аѕ. The ѕоlutiоn liеѕ in the аnѕwеr tо thе next quеѕtiоn.

  3. Hоw does my lауоut look? Anоthеr еxtrеmеlу соmmоn mistake that саn nоt only саuѕе fruѕtrаtiоn and wаѕtеd time are nоt mаking a drу lауоut of their tilе bеfоrе they install it. Whilе all professionals knоw bеttеr, thiѕ iѕ nоt thе case with mаnу DIY’ѕ whо аrе a littlе tоо еxсitеd tо get ѕtаrtеd. Yоu wоuld bе surprised hоw many people ѕimрlу ѕtаrt in thе mоѕt соnvеniеnt соrnеr оf thе rооm and kеер gоing until thеу rеаlizе thеir tilе раttеrn iѕn’t lining uр or lооking likе it ѕhоuld.

    A drу lауоut iѕ will ѕhоw уоu what tiles nееd to be сut, if аnу, аnd hоw thеу nееd to bе рlасеd tо look аnd fit right. It’s also very imроrtаnt fоr аnоthеr rеаѕоn wеll. While thаt beautiful tilе pattern уоu сhоѕе lооkеd good оn paper, in your hеаd, аnd еvеn whеn you lаid out a fеw tilе ѕаmрlеѕ on уоur flооr, it’s not enough to provide you with an accurate assessment of what the finished tile job will rеаllу lооk like in уоur rооm.Tile patterns can make a floor or wall look too widе, оr nаrrоw. A layout can reveal сlаѕhеѕ with the соlоrѕ оf thе walls, оr maybe it juѕt doesn’t look like you thought it might. Hореfullу уоu’ll lоvе it, however, аnd be validated that you mаdе thе right dесiѕiоn. But it is always bеttеr to lау it оut first, and ask уоurѕеlf whаt уоu rеаllу think. If уоu don’t quеѕtiоn, уоu соuld ѕреnd thе next 15-20 уеаrѕ lооking at a bad personal decision that is worth the time and effort. This hарреnѕ wау mоrе often than уоu might think.

The Definitive Guide To Tile Patterns Infographic

Listed here are the options you will have to choose from.

Tilе Grid

Divi WordPress Theme

The mоѕt соmmоn of аll tilе раttеrnѕ, thе grid method lооkѕ еxасtlу likе it ѕоundѕ. Square tilеѕ аrе аrrаngеd one a top the оthеr аnd ѕidе by side ѕо thаt it has thе appearance оf a grid. This iѕ аlѕо vеrу boring. Trу tо аvоid thiѕ mеthоdѕ. It аddѕ vеrу little tо a room’s арреаl. One оf the (only) аdvаntаgеѕ of thiѕ look iѕ that it mаkеѕ tilе сlеаning easier because the grоut runs in simple сhаnnеlѕ and not in аnу kind оf соmрlеx раttеrn.

Diаmоnd

An act аѕ ѕimрlе аѕ rotating thе tilе forty-five dеgrееѕ аnd then lауing thеm out in a grid pattern саn have a trеmеndоuѕ effect оn the lооk оf a room. Whеrеаѕ thе bаѕiс grid lооkѕ dull, thе diamond раttеrn iѕ mоrе аеѕthеtiсаllу рlеаѕing аnd rеԛuirеѕ nо mоrе work than thе оthеr design. If уоu want a ѕimрlе, chic lооk, diаmоnd iѕ thе wау tо gо.

Tilе Bаѕkеt

If уоu аrе opting fоr rесtаngulаr tile, the bаѕkеt раttеrn саn аdd a соmрlеx lеvеl оf сhаrm tо a rооm. Take twо or three tilеѕ and lау thеm vertically; the combination оf аll three ѕidе bу ѕidе ѕhоuld bе in thе ѕhаре оf a square. Bеѕidе that, lay the same number оf tilеѕ hоrizоntаllу and repeat thе раttеrn. Eѕѕеntiаllу thiѕ replicates grid tile раttеrnѕ, but iѕ mоrе viѕuаllу intеrеѕting bесаuѕе thе “squares” within уоur grid аrе divided intо three рiесеѕ.

Road

You саn сrеаtе a раttеrn thаt rеѕеmblеѕ a rоаd wеаving through a сitу blосk bу аltеrnаting square аnd rесtаngulаr ѕhареd tilеѕ. Stаrt bу рlасing a rоw оf ѕquаrе tilеѕ in a row, аѕ if уоu were creating a grid pattern. On tор оf thоѕе, hоrizоntаllу run a rоw оf the rectangular tilеѕ, and thеn аnоthеr rоw оn tор of thаt. Finаllу, start thе раttеrn аgаin, by placing your ѕquаrеѕ аtор thе two rесtаngulаr rows.

Pinwhееl

This iѕ оnе оf the more соmрlеx tilе раttеrnѕ, but сrеаtеѕ a vеrу intеrеѕting lооk tо your flооr. Start in thе middlе оf the flооr аnd place a ѕquаrе dоwn. Next, рut a rесtаnglе рiесе оn tор of thаt, squaring up thе еnd оf thе rectangle with the tор lеft соrnеr of your square. There ѕhоuld bе a good роrtiоn оf уоur rесtаnglе hаnging оvеr thе top right оf thе square. Tаkе аnоthеr rесtаnglе and place it with thе right ѕidе uр аgаinѕt this оvеrhаng. Repeat this around the perimeter. Onсе this iѕ complete thе раttеrn саn bе rерliсаtеd over thе rеmаindеr of thе floor.

Comparing Manual Tile Cutters; Five That Make The Cut

Comparing Manual Tile Cutters; Five That Make The Cut

Should you use a manual tile cutter or an electric tile cutter – what's the difference? First, let's briefly compare the two.

Manual Tile Cutters

The benefits of using a manual tile cutter:

  • Excellent fast cuts with minimal effort
  • Many size options
  • Easy To Use
  • Power options for different materials
  • Fixed or single point breaker or mobile or multi-point breaker
  • Low maintenance

The disadvantages of manual tile cutter:

  • Limited cut options
  • Prone to less accurate cuts (depending on the user)

Electric Tile Cutters

The benefits of an electric tile cutter:

  • More cutting options depending on model
  • Diamond blade with electric motor
  • Will cutter a broader range of materials
  • Can operate with or without water for cooling

The disadvantages of an electric tile cutter:

  • Slower
  • Bulky/heavy transport

Once you’ve determined which is the best tile cutter to use for you, you’ll have plenty of options to choose. In this article, we’ll focus on five different brands of manual tile cutters.

  • RUBI
  • RTC
  • Batipav
  • Sigma
  • Tomecanic

Rubi Manual Tile Cutters

For speed and convenience, RUBI manual tile cutters are used more often than electric cutters. The variety of manual RUBI tile cutters gives you the option of matching the right cutter with the material you are cutting. A good match will result in cleaner cuts. Thicknesses between 6 and 10 mm tiles are more fragile and will need a cutter that provides for gentle treatment. RUBI offers the widest variety in purchasing options, and therefore allow for a greater variety of cuts.

There are quite a variety of options to choose from within the RUBI brand. We’ve listed five of those options here with descriptions to give you the information you need to make the best choice.

1. RUBI Slim System Thin Tile Professional Cutter – 122″ Cut

  • Provides straight cuts without inconsistencies Offers high-quality performance.
  • Cutting capacity of up to 310cm. (extendable)
  • Built for cutting large format porcelain, between 3mm and 8mm thick Silicone cords and fixed suction pads
  • Tungsten carbide roller w/titanium treatment bearing of Ø22mm
  • Gradual separation and adjustable pincers to reduce tile breakage

Price: $595

2. RUBITR Series Tile Cutter – 24″ to 28″

  • Multipoint breaker gives precisediagonal cuts
  • Perfect for both wall and floor tiles
  • Central pivot swivel square
  • Lateral stop for repetitive cuts
  • Improved visibility with double guide for of the scoring and cutting
  • Scoring wheels for every material (interchangeable)
  • Guides are rectified steel and chromed with anti-rust treatment.
  • Sturdy aluminum, 2-layer base supports large format tiles with shock absorption

Price: $409.95–$489.95

Divi WordPress Theme

3. RUBI TS Plus Series Tile Cutters – 17″ to 29″

  • Single point breaker
  • Up to 800 Kg breaking pressure
  • Reinforced base
  • Perfect view of the scoring/cutting line with double guide
  • Rectified and calibrated chrome steel guides and anti-rust treatment.
  • Interchangeable scoring wheels (6 mm to 22 mm range)
  • Transport case

Price: $325.00–$465.95

4. RUBI TS Series Manual Tile Cutters – 17″ to 26″

  • TS Series built for precision cuts and breaking power

Price: $315.00–$389.95

5. RUBITX-N Series – 28″ to 49″

  • TX series has added breaking for use on large format tile.
  • Powerful cutter with detailed angular measurement system
  • Optimal cutting of ceramic, porcelain, and pressed tiles
  • 1000Kg power breaker
  • Central pivot swivel square for precise angular cuts
  • Adjustable scoring wheels
  • Reinforced breaking
  • Lateral stop
  • Aluminum two-layer base with shock absorption
  • Heavy duty case included

Price: $595.00–$1,050.00

RTC Manual Tile Cutters; For Accurate Smooth Cuts

Combining the best of the best features, the RTC Razor comes in several designs. The Razor Pro has 11 ball bearings mounted in the handle carriage to guide the handle on the guide bar. The handle itself is a cantilever braking mechanism that increases braking power better than any cutter on the market.

The RTC Razor Pro Single Bar Push Cutter – 22″ to 52″ offers the same features as the Razor, but cuts perfectly on ultra-hard porcelain with an accurate scoring line on a rough surface tile.

 Price: $395.00

Sigma Manual Tile Cutters; Options From Minute To Mammoth

For many decades, Sigma Italia has built some of the most elite manual tile cutters in the industry.  Ranging from the 14″ 2G Sigma Tile Cutter to the 3F3 60″ Sigma large format beast, Sigma’s variety is impressive.

Sigma Tile Cutters cut porcelain clean and fast. They have specialized in making equipment for tile installers since 1964.They offer a guarantee that all models meet the highest safety and strength standards, including the very high European standards.  Sigma sells Pull Cutters, Sigma Thin Panel Tile Tools, and Sigma Max Cutters.

Designed with a spring-loaded ball bearing mounted scoring wheel, The Sigma Max Push Handle cutters are custom-madeand manufactured for accurate and consistent scores on uneven surfaced tile. They are perfect for wood or stone looks on an ornate or textured tile. Their design eliminates difficult cutting of textured tile with a manual cutter. It alsoreduceswasted tile pieces and uneven breaks.

The pull handle action Sigma Tile Cutters set the bar high in design and durability. Sigma Italia has repeatedly produced this industry standard for several decades.  The Sigma Pull Handle Tile Cutters vary in size from 14″ to 36″.

Battipav Manual Tile Cutters; Five Industry Heroes With Endless Options

Battipav offers five different categories of manual tile cutters. Each category has multiple models to choose from and ensure every need on any project can be met. Listed here are five categories.

  1. Super Pro 450
  2. Profi
  3. Cutters X-Pro
  4. Ultra
  5. Basic Plus

Price: $280.00–$635.00

Tomecanic Manual Tile Cutters; Four For The Floor

Tomecanic manual tile cutters are used widely by do-it-your-selfer’s and professionals alike. They cut reliably, quickly, and smoothly. Replacement cutting tools and blades are readily available and priced at a good value.

Tomecanic manual tile cutters are high-quality and dependable. All models are designed to help you preserve excess waste material resulting from bad cuts. Their reputation is highlighted by durability and high-performance. Below are the four most popular selling Tomecanic Manual Tile Cutters.

Tomecanic 24″ Supercut 2160 Tile Cutter

  • Designed to score fired clay ceramic tiles with a glaze coating,this ceramic tile cuttercan cutfully vitrified porcelain tiles as well as some unglazed clay tiles.
  • Able to withstand 2500 lbs. of pressure, the braking system comes with a robust multipoint separator.
  • The single rail guide does not flex cutting in the center of porcelain tile
  • Self-lubricating bearings help cutting head slides easily on
  • Better shock absorption with breaking pads mounted on springs
  • Cut-out under breaking pads allows for tile cuttings to fall for easy cleaning.
  • Allows thick materials to be quickly cut
  • Length of Cut – 24″. Diagonal Cut – 16″. Weight – 27 lbs.
  • 9 ball bearing system cutting head allow for super accurate and easy scoring.
  • Large breaker and spring loaded pads for easy snapping of tile.

Tomecanic 35″ Supercut 2190 Tile Cutter

  • 35″ length of cut and 24″ Diagonal cuts
  • Breaking System Lever produces 2500 lbs of pressure when splitting tiles with a robust multipoint separator
  • Cuts floor tile, mosaics, porcelain, and similar materials
  • Easy and accurate scoring
  • Big-size breaker with spring loaded pads for easy snapping of tile.
  • The single Rail guide doesn’t flex when breaking porcelain tile in the center of the tile

Tomecanic 29″ Supercut 2175 Tile Cutter

  • 29″ length of cut and 20″ Diagonal cuts
  • Used for cuts on a variety of materials including porcelain, floor tile, and mosaics
  • Big-size breaker with spring loaded pads for easy snapping of tile.
  • Breaking System Lever produces 2500 lbs of pressure when splitting tiles
  • No flex when breaking porcelain tile in the center of the tile (single rail guide)

Tomecanic Primo 16″ Tile Cutter

  • Ideal for the do-it-your selfer
  • Cuts tile straight and at a 45-degree angle; also cuts porcelain
  • Length of Cut – 16 inch Diagonal Cut – 11 inch Weight – 6 lbs.
  • Heavy-duty steel base
  • Precision score and snap and replaceable wheel included

Price: $350 – $597

Comparing Tile Leveling Systems

Comparing Tile Leveling Systems

Comparing Tile Leveling Systems

RUBI Tile Level Quick Leveling System

Method: RUBI Tile Level Quick comes in the format  of a kit making it a user-friendly purchase that won’t waste your time looking for material and tools separately. Nippers, quick strips, caps are all sold together in a bucket-type container.

This process of installing and leveling your new surface is about as easy as it gets. The overall method can be summarized in three easy steps.

  1. Place the tiles using the grooved-based straps (the groove allows for a better grip). The straps allow for a minimum joint of 1/16” and unlike other leveling systems, there is no need to dip the straps in water before using them.
  2. Slide the re-usable caps over the strips as they sit vertically sticking straight up from your tiles.
  3. Use the plier tool to bend the straps over the caps, putting pressure on the caps and securing the tiles in place. This restrains the shifting of parts while the adhesive is setting, and prevents tile lippage that results in a finished flat surface. This tile leveling system can be used for the installing of both horizontal and vertical surfaces, meaning it’s usable for both floors and walls.
  4. After the floor or wall is set (the double gluing technique is always used) the caps are removed by an impact. Simply by kicking them off a floor surface or removing them from a newly tiled wall, ready to use for the next job. (Note: Always remove the caps in the direction of the grout joint).

This system was developed to save time in installing large format ceramic tiles, particularly in rectified porcelain tiles, as well as to provide the perfect setting and leveling with virtually any material or dimension. Ideally,12” x 12” tiles or larger work great with this system. The RUBI Tile Level Quick System reduces installation time for both floors and walls, making it a more efficient use of your day. Of course, for a professional, that means increased savings and profit.

The kit comes ready to use in a practical bucket-style storage container with a well-placed handle for easy use and carrying. Here is what you comes with the kit:

  • Tile Level Quick 1 pliers which can be utilized for both floor or wall tiling.
    (Note: The pliers are made of two types of metals allowing a height control system that is easy to use.)
  • 100 strips
  • 100 reusable cups

Material: Large format ceramic tiles (particularly in rectified porcelain tiles). Can also be used for leveling granite and marble tiles.

Thickness: Compatible with the tile of thickness levels between 1/8″ and 5/8.”

Price: Approximately $55 per kit

RUBI Delta Tile Leveling System

Method: You do NOT want to get in a fight with a wall or a floor. The RUBI Delta Tile Leveling System is akin to bringing in a fleet of military tanks to enforce a no-lippage policy. No lippage equals flat floor or wall surface. So how does this tool in your arsenal of leveling systems work?

The concept is fairly elementary and easy to implement. It’s often referred to as the “back buttering technique.”

Using a coordinated system of strips and wedges, the tiles are first set into place using the strips. The wedges are then placed under the loop-like strips, and the nippers are used to allocate the amount of pressure to hold the curing tiles in place. Once the adhesive has completely cured, the wedges and strips are removed with a rubber mallet or by kicking them off of the tiles. You can reuse the wedges multiple times, so don’t throw them away!

The RUBI Delta Tile Leveling System is recommended for 12” x 12” or larger tiles. Thicknesses can vary from 1/2″, 9/16” or 3/4″ depending and is reliant on the form or model of the strips you use.

The plastic strips that come with the Delta System are available in different thicknesses, 1/32″, 1/16″, and 1/8″, and also a variety of heights that allow you to work with tiles of various thicknesses: 1/8″-1/2″, 1/4″-9/16″ or 7/16″-13/16″. The plastic material of the strips is specifically designed to avoid problems with air bubbles when pressure is applied, which ensures that the tiles align. It’s worth noting that the DELTA system allows any installer the option of working with any tile spacer.

RUBI does offer DELTA strips to professional installers in three different packaged units. Strips come in bags of 100, 200 and 400 units (for some models there is a 2400 unit box they offer).
This system delivers as promised, preventing tiles from moving while the adhesive sets as well as while installing.

The RUBI Delta Tile Leveling System kits come in three formats

Divi WordPress Theme
  • 1/32″
  • 1/16″
  • 3/32″

The kit includes:

  • One nipper plier that can be used for both flooring and walls (horizontal and vertical tiles)
  • One bag of 100 units of strips for use in ceramic tiles with thickness between 1/8″ and 1/2″
  • One bag of 100 units of reusable wedges.

All components in the the RUBI Delta Tile Leveling System kit come in a bucket with a handle making it easy to move with you.

Material: 12” x 12” or larger ceramic tiles

Thickness: Compatible with tile thicknesses of 1/2″, 9/16” or 3/4″

Price: The RUBI Delta Tile Leveling System is not available in the USA yet. It can be purchased in Canada or Europe.

DTLA Tile ComparingTile Le veling Systems

Spin Doctor

Method: The Spin Doctor Tile Leveling System involves a process in which the installer screws into place a baseplate using a twistable cap. It takes minimal effort and can be accomplished u sing just one hand, which is especially useful when installing larger tiles and reducing fatigue. The Spin Doctor System is composed of four separate components which you can purchase separately.

The spacer posts may be used again after being removed from the base as additional spacers or wall shims. The caps have an open design that allows the installer to view the grout during installation. The caps are removed quickly and easily and can be used again when the tiles have been set and cured.

  • Red Breakaway Threaded Spacer Posts 1/16” (1.5 mm)
  • Black Breakaway Threaded Spacer Posts 1/8” (3mm)
  • Leveling Cap
  • Optional Anti-Friction Protection Plate

Material: Accommodates all materials.

Thickness: Accommodates most all thicknesses.

Price:

  • Black Breakaway Threaded Spacer Posts 1/8” (appx. $16 for 100-piece set)
  • Red Breakaway Threaded Spacer Posts 1/16” (appx. $14 for 100-piece set)
  • Leveling Cap (appx. $78 for 100-piece set)
  • Optional Anti-Friction Protection Plate (appx. $14 for 100-piece set)

QEP

Method: QEP Tile Leveling Clips are plastic spacers used in combination with leveling wedges to form the LASH Tile Leveling System. This system is available in two sizes, original (for 3/16” to7/16”) or XL (for ½” to ¾” tile). The LASH system is quick to install and adjust and hold the height of the tiles evenly while the tiles cure. Made of durable nylon and colored a bright yellow for easy identification, QEP clips are used for installing stone, thin and rectified porcelain and marble tile. Learning to use the QEP system is relatively easy, and once you get the hang of it, installations go pretty fast. When used correctly, the result is a smooth tile surface with a professional finish.

Material: Marble, Stone, and Porcelain Tile

Thickness: Original (for 3/16” to7/16”) or XL (for ½” to ¾” tile)

Price:

  • LASH Tile Leveling, Aligning and Spacer Clips ($10 per 96-pack)

Tuscan Cap And Strap

Method: The Tuscan Leveling System works for use with marble, stone, granite, ceramic, and any large format style. The Tuscan Cap and Strap is a two-piece system (cap and strap) and is interlocking , meaning that the tile pieces fit together similar in fashion to a puzzle. This “puzzle process” helps the surface cure evenly and provides for less warping and shrinkage during setting. Furthermore, tiles are laid more efficiently without the need to re-lift tiles for additional shimming or adding more mud. The caps, similar to the Spin Doctor Tile Leveling System, are also reusable. One important thing to note is that the “Cap and Strap” method does require that you use a unique ergonomic installation tool. This tool comes with your purchase if you buy this system as a set.

Material: Marble, Stone, Granite, Ceramic, and any large format style

Thickness: The Tuscan Cap and Strap System is recommended for gauged tiles 12″ or larger of any uniform gauge thickness.

Price:

  • Caps (appx. $190 for 200 Reusable caps)
  • Straps (appx. $120 for 500 leveling Straps)
  • Pearl Abrasive Tuscan Level Standard Ergonomic Tool (appx. $49)
  • Full kits run from $189 (System DIY Kit), $345 (System Pro Kit), or $800 (Contractor Kit)

Seam Clip

Method: The One-Piece Seam Clip system is enticing because it requires no special tools to install or remove tiles. The system works by sliding the base under the tile, closing the wings on the side, and removing t he top portion by tapping it with a rubber mallet after the tiles have cured. Whether installing granite, stone, marble, ceramic, and some larger tile formats (3/8″ to ½” in thickness) , seam clips are very easy to use.

There is a premium Seam Clip Leveling System produced in Australia that uses “Clip-iT” wedges. These wedges, made of polymer material for indoor or outdoor use, are durable and reusable and appropriate for use with natural stone, porcelain, ceramic, marble, or granite tiles. The wedges are specifically designed to reduce the stress and fatigue that often occur on an installer’s fingers. The wedges have round edges and a broader, soft thumbprint area.

Material: Granite, Stone, Marble, Ceramic, and some larger tile formats

Thickness: 3/8″ to ½” in thickness

Price:

  • Tuscan Seam Clips Only (appx. $51 for 150-piece set)
  • Tuscan Seam Clips Only (appx. $142 for 500-piece set)
  • Tile Master (appx. $116 for 300 Spacers and 100 Wedges)

T-Lock

Method:The T-Lock Tile Leveling system operates under the premise that every tile laid assis ts their adjacent tiles to remain flush by their surrounding tiles. T-Lock can provide a faster installation process involving spacers and wedges. A relatively uncomplicated process, the T-Lock system can result in precise leveling with no added tools necessary.

Material: Any tile material including large format, heavy tiles with rectified (sharp) edges.

Thickness: Universal system works for all thickness measurements.

Price:

  • T-Lock 1/8” Complete Kit (appx. $115)
  • T-Lock Wedges (appx. $38 for 100 Red Wedges)
  • T-Lock Clips (appx. $66 for 250 1/8” Clips)
  • T-Lock “Perfect Level Master” Pliers Tool (appx. $63) *Only works with T-Lock Tile Leveling System

Your floor or wall should be aesthetically pleasing, but also perfectly level. Understanding your options regarding which leveling system to choose is crucial. While all leveling systems aim for the same goal of creating precision evenness, not all are universal in their usability and success rate. Your new tile surface will go through a curing process, and it is during that process that leveling systems maintain the secured placement of each tile. If your tiles remain in place and don’t slide or sink during that curing process, your surface will be as smooth as a glass mirror.

*For additional reference, please see our “Comparing Tile Leveling System” visual guide explaining each tile leveling system with graphics.

9 Tricks You Can Do With Your Bathroom and Make it Even More Aesthetically Pleasing

9 Tricks You Can Do With Your Bathroom and Make it Even More Aesthetically Pleasing

9 Tricks You Can Do With Your Bathroom and Make it Even More Aesthetically Pleasing

Bathroom remodeling in Los Angeles is all about the details; whether you are going to get professional help or it is a weekend DIY project, there are lots of things that you can do better and make a big difference in the ultimate outcome. Ceramic tiles are considered the easiest tiles to handle so feel free to experiment with those. Following are some tricks you can do with your bathroom space and make it more aesthetically pleasing.

Stripes

Using stripes in bathroom is not an out of the world idea and neither a new one. However, when everyone thinks about horizontal stripes, you should go with vertical stripes that would send a bold message to everyone. Interestingly, the verticals stripes work with all colors and textures; you can use matching colors for vertical stripes with different tones or you can use an exotic color for stripe while using a mild color for the rest of the wall. There is no limit on patterns too and you can experiment with patterned tiles using for vertical stripes.

Stripes Combo

Using vertical and horizontal stripes combo is the latest trend in tiling industry and our designers at DTLA Tile and Stone have used this layout in many bathroom spaces successfully. Although using a stripe combo looks like the next step of using a vertical or horizontal stripe but actually these are two entirely different layouts with entirely different idea behind them.

The purpose of using a single stripe is to put some diversity in the equation and this is particularly good for typical bathroom spaces. On the other hand, the idea behind using a stripes combo is to put some harmony in the bathroom space which is atypical and comes with lots of design elements.

Cutting Tiles at 45 Degree Angle

Now that’s a whole new way of giving your bathroom space a dramatic look. Cutting tiles at 45 degree angle instead of the usual 90 degree would help you make your bathroom more aesthetically pleasing and give it a modernized look within your budget. However, this idea is not for everyone and specifically not for the first timer because you would need to cut lots of tiles.

Divi WordPress Theme

Cutting tiles would also increase the chance and cost of breakage. The best way to apply this idea is on ceramic tiles as they are relatively cheaper and easier to cut. Also, you need to mark the tiles carefully with the right angle otherwise they would fit properly or/and look weird.

Flooring

Sometimes you find a tile with a bold design and you are not sure whether it would be a good idea to use it in your bathroom or not. Regardless of the design on the tile, it is always a good idea to use a feature tile on your bathroom to give it a sense of diversity. However, it would be even a better idea to use it in a small space so preserve the design of the rest of the space. For example, you can use a feature tile in shower flooring.

Monotonic Bathroom

Interestingly, monotonic bathroom design is the simplest idea but it just got some traction now. We are not talking about using a uniform color in your bathroom space but it is about using the same patterned or feature tiles in the entire bathroom space including floor and walls. This kind of bathroom design can create a little drama and based on our experience in DTLA Tile and Stone, this design beautifies the bathroom spaces with a window that can break the fluidity of the look.

Do Your Research

That seems like a cliché but the majority of homeowner (whether they get professional help or do DIY project) don’t do their homework before getting their hands dirty. Even if you are hiring professionals to do the job, you need to look at lots of photos to get inspiration and to decide which kind of bathroom you want. Of course experts can recommend things but they can’t possibly know what you want. You can either do a quick Google search or use some specialized websites like Pinterest to get creative ideas.

Dual Tone

Using two entirely different tones in your bathroom space is a great way to create a sense of symmetrical design even though the layout is asymmetrical. However, selecting those two tones need some extra efforts and you might need the help of computer generated graphics to get the idea. Also, this color scheme looks good in bathroom spaces with less design complexity. Some popular and most obvious schemes are blue-white, green-white and maroon-white but don’t afraid to do your own experiments.

Lighting is Important

If you ask us one thing that we have learned the hard way at DTLA Tile and Stone, it would be the importance of lighting. A good bathroom design would be a good bathroom design only if you have good lighting arrangements there. You need to consider the lighting situation (whether the bathroom would get natural light in the day time or not) before you choose the tiles or design the bathroom. Strategically placed lights can emphasize the design elopements of the bathroom space and that’s what matters.

Hex Tiles

Hex tiles now have the same status that triangular tiles had a few years ago but unlike triangular tiles (which are not as popular as rectangular tiles or square tiles) hex tiles are getting lots of popularity nowadays. Although you can use bigger hex tiles on your bathroom walls but it would be even a better idea to use rectangular or square tiles in your bathroom space with a sober color and use small hex tiles in your shower space with an exotic or at least bright color like aqua. Small hex tiles come in mosaic sheets that are easily installable.