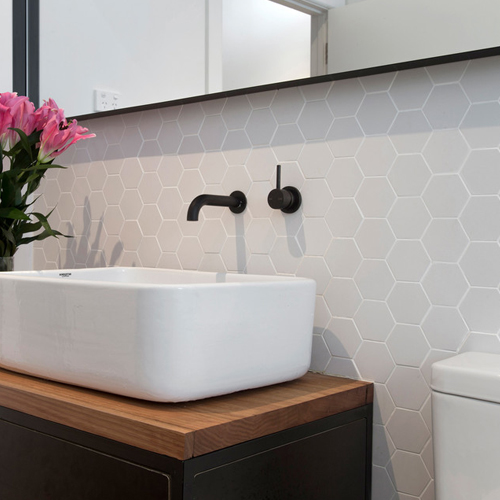
Hexagon tiles which are also known as hex tiles have been getting popularity all over the globe. These tiles are used in mostly bathroom remodeling in Los Angeles however you can use them effectively in kitchen remodeling jobs too. Like other shapes (rectangle, square and triangle) hex tiles are also available in lots of colors, materials and sizes. Considering using hex tiles in bathrooms is a newer concept, you can remodel your bathroom with hex tiles to give it a modern look that would help in selling the house if that’s your plan.
Tips about Using Hex Tiles in Bathroom or Kitchen Space
Let’s see how you can use hex tiles effectively to make your bathroom more attractive.
Add Texture
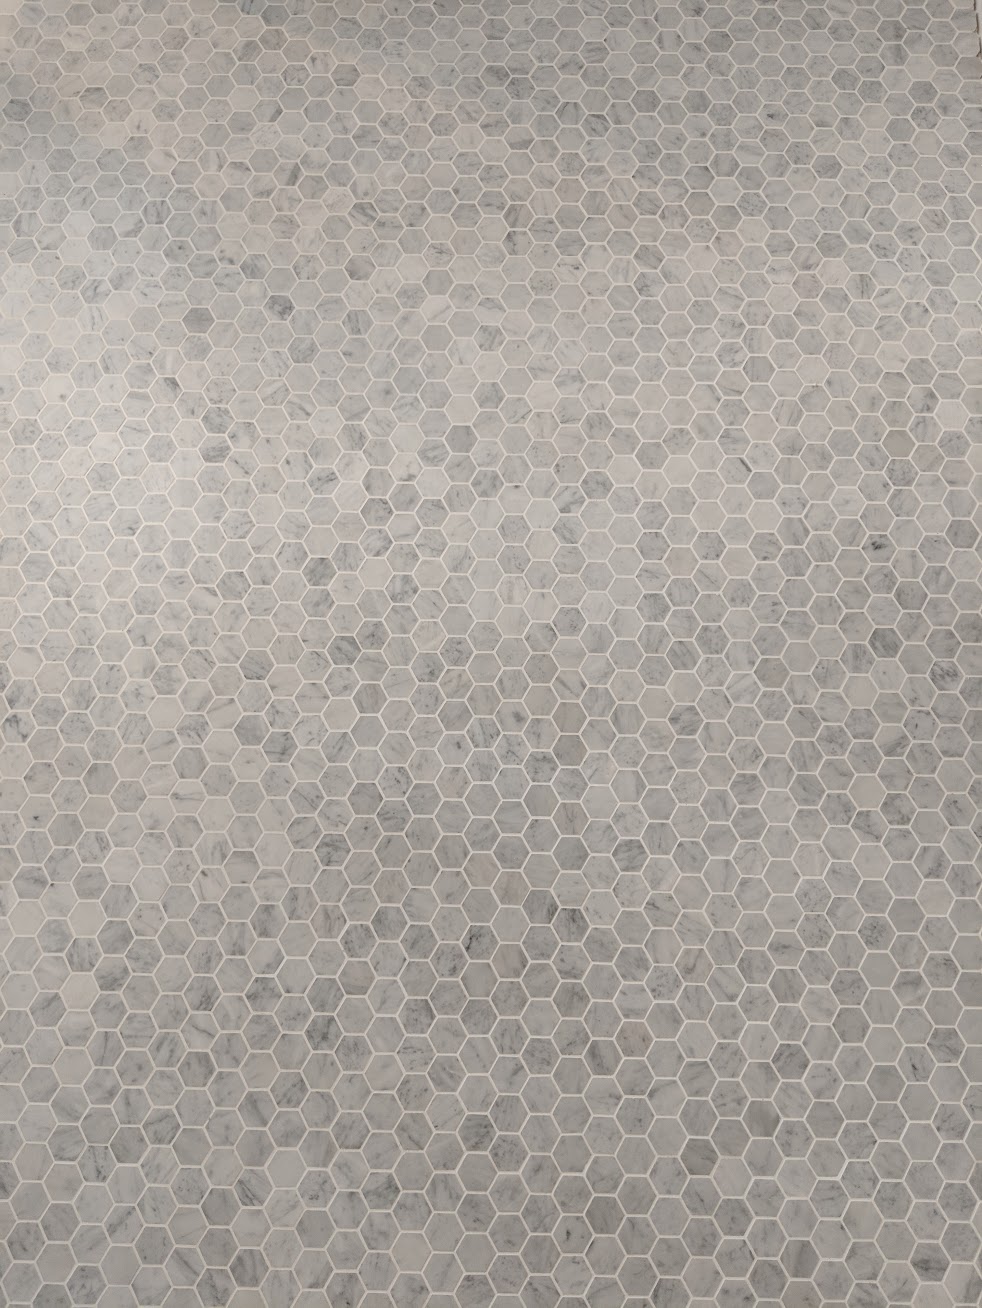
If you think your current bathroom or kitchen space is kind of boring then hex tiles can help you there. Interestingly, triangular tiles were introduced to send a bold message and now hex tiles have adopted that job. Using hex tiles with contrast grouting can help the layout pop and make an impression. This particular design looks like a textile design and add textures in the bathroom space.
Use Multiple Designs
Unlike other tile shapes like rectangle and square, hex tiles are pretty tolerant when it comes to using multiple designs at a single wall or floor. As mentioned above, hex tiles come in many colors and you can mix and match different colors for a modernized design. For example, you can use the same color with different tones or you can even use contrast tiles for an abstract design.

Don’t be Shy
Unfortunately, many people think that hex tiles are only associated with bathrooms and kitchens. It is unreasonable assumption as all other shapes like bricks, rectangles, square and triangles are used everywhere including countertops, backsplashes, floors and walls. Hex tiles should be used more often regardless of the application if the design space allows. You can use hex tiles anywhere you want including stair walls or floors.

Color Splash
Hex tiles allow the home owners to do lots of experiments with colors. You can mix colorful hex tiles with a single wall made of single color tiles. This specific design idea can help you beautify kids’ room without spending ridiculous amount on tiling and flooring. Even few colorful hex tiles in the boring design space can make the design pop. However, don’t forget to balance the use of different colors and it is recommended to use a pseudo random color formation.
Create Drama
Hex tiles are not linear as square tiles or rectangular tiles; if you use different tones with matching grouting, it is possible to make a bold statement by making the entire wall with hex tiles. As square and rectangular tiles could be used at a single space to give it a varying effect, the same could be done by using hex tiles with square tiles or rectangular tiles. For example, you can use hex tiles on an entire wall and use rectangular or square tiles for flooring.
How to Install Hex Tiles?
It is with no doubt that hexagon tiles look good in any kind of space whether a room, kitchen or bathroom. However, these tiles need more careful installation than other shapes like square or rectangle because they have more sides. Considering you are spending a hefty sum of money on kitchen or bathroom remodeling, it is recommended you hire a professional for this sort of tile installation especially if you don’t have any experience in tile installation. Let’s see how you can install hex tiles properly.
First of all, you need to clear the space; removing the old floor is half the job so don’t take it lightly and consider this too while setting a budget for the tile installation job. If the old flooring hast not already removed or you are installing tiles for the first time then you need to make sure the substrate is absolutely flat and level. If you have even the slightest imperfection in the floor, the hexagon tiles will accentuate this and the finished floor will look wavy. A good analogy is this. What would the finish floor look like if you had to tile a ball? Unlike square and rectangular tiles that could be installed in corners without any nipping, hex tiles need to be cut perfectly for the corners.
You can use a tile nipper, wet saw, or manual cutter to cut tiles and make them compatible with the corners but we recommend a higher end wet tile saw or high end manual tile saw like a Montolit. Once you install the first few tiles in the corner, the rest is a pretty straightforward job. Bigger hexagon tiles come individually and require you install them individually while smaller hexagon tiles come in mesh sheets just like mosaic tiles. These mesh sheets require patience to work with but if you follow a few simple tips, your floor will look amazing. Remember, one mistake in the installation of a hexagon mesh sheet will destroy the entire installation.
For starters, hexagon mesh sheets should never be laid in a grid pattern. They should be laid using a 1/3 offset to minimize the final grouted floor to appear as individual mesh sheets as opposed to a cohesive hexagon floor. Ensure you step back and look at each mesh sheet after it is installed. Ensure you are using a laser and/or level to keep the tiles in square. Use a properly sized trowel! An improperly sized trowel will make your life a living hell as you will have too much thin-set mortar on the floor causing it to squeeze through the grout joints as you tamp down the mesh sheet. Lastly, be patient during the installation process. Hexagon tiles, with their intricate patterns, may require more attention to detail. Take your time aligning each sheet, adjusting as needed, and double-checking the spacing. This meticulous approach will pay off in the end, leaving you with a beautifully installed hexagon tile floor that enhances the aesthetic of your space.
When tiling, use a high quality thin-set. We recommend and only work with Laticrete based thin-sets. If you are going to your local biog box store, chances are, you are not going to find a good thin-set. There are essentially two types of thin-set mortars in the market; pre-mixed and powdered form. It seems the pre-mixed mortar is an easier option but professionals prefer powdered form so they can control the density of the mixture. While mixing thin-set mortar, do not make lots of it at once because it gets dry very quick and once hardened, it is useless.
After installing all the tiles, it is recommended to give it a few hours to dry. After that you can start applying grout. Usually contrast grouting looks better with hex tiles but there is no hard and fast rule so you can select any color of your preferences. Based on the grout joint between the hexagon tiles, you can apply a sanded, non-sanded or epoxy based grout – both of these types are easily available in the market. Sanded grout is good for larger grout joints while non-sanded grout is thin and suitable for smaller grout joints. When you are unsure, check the manufacturers instructions for grout compatibility. After applying the grout, you can clean the excessive grout with sponges and micro-fiber towels. Give the grout ample time to dry and then you are good to go. As always, drying times depend on several factors and you should always refer to the manufactures instructions.