
Fact vs Fiction – The Truth about Cement Tiles
Not a week goes by that a potential customer calls me complaining about various ailments with a new or existing cement tile installation. These ailments include but are not limited to:
– Cracked tiles
– Picture Framing
– Grout cracking
– Stains of various sorts
– Powdery or dirty surface
– Etching
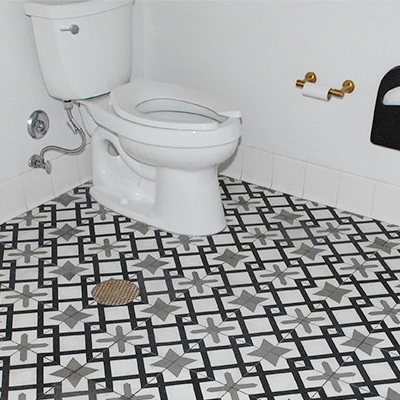
Before I dig into the problems, it’s important to note what I am referring to when I say, Cement Tile. Cement Tiles are typically 8″ x 8″ x 5/8″ (20cm x 20cm x 1.6cm) in size. FYI, If you’re reading this, it should be noted that Cement Tiles are also known as Cuban, Mission, or Victorian tiles. Many tile vendors now carry different sizes of Cement Tiles. While they traditionally came in elaborate patterns with different colors, they are also found without patterns and single colors. From Spanish type patterns to mid-century modern colors and shapes, you will find a wide variety of patterns and colors to choose from.
Cement Tiles are hand made and comprised of three layers. The lower layer is made up of a cement base (ahem, actually concrete). The middle layer is made up of sand and grey cement. Finally, the top layer (what you walk on) is made up of colored cement commonly referred to as “pigmented cement”.
All of these layers are stacked upon one another in a mold and then compressed together hydraulically. There are faux cement tiles with the same sort of patterns you find in real Cement Tiles but these are normally porcelain. When in doubt, the dead giveaway is the thickness of the tile. OK, let’s circle back to the cement tile problems I hear too often about.
Of all the problems I listed earlier, the vast majority of these problems can all be tracked to one place. The installer. You see, people no longer read instructions. They believe Cement Tiles are installed just like every other porcelain / stone / ceramic tile. Sorry, this is just not the case.
The installation of Cement Tiles require a multi-step process that takes time. It doesn’t take rocket science but does require the tile installer to follow a simple checklist. Follow it to the motherland I say. Many of these checklists can be found at reputable retailers and manufacturers. Some of my favorites are located here:
Granada Tile – How To Install Cement Tile
Zia Tile – How to Install Cement Tile
While these installation guides are pretty good, they appear to be written by someone who has never installed tile but instead works in the marketing department. Hence, consider this to article to be the one guide that rules them all.
I can’t begin to tell you how many times I have read that cement / encaustic tiles are too difficult to install, don’t last, or don’t look good after install. Most of the bad information out there comes from folks who run click bait blogs full of affiliate links. These folks have never actually performed a correct install of cement tiles. Some of these click baiters are outlined below:
Apartment Therapy – What No One Tells You About All Those Beautiful Cement Tiles
The Decorologist – The Myth of Encaustic Tile and the Truth You Should Know

Bob Vila – 7 Things to Know Before Installing a Cement Tile Floor
Seriously, do you think Bob Vila has installed a 1500 square foot cement tile floor? Or some person who runs a blog about decorating has ever actually sealed a cement tile? Probably not.
OK. Let’s dig into some of the common problems I run into.
Problems
Cracked Tiles
When I see one cracked tile, I write it off as fluke. If I see multiple cracked tiles, I automatically know that there is something wrong with the substrate. The substrate is the underlying floor that the tiles are attached to. This can be a concrete slab, cement backer board, or a float job. Like most tiles, cement tiles require an absolutely flat substrate. If there is any unevenness or voids under the tile, they tend to crack when people walk over them. This is not specific to cement tiles, but, endemic to any type of flooring really. If you are experiencing cracked tiles, the issues with the substrate must be fixed. Hence, at a minimum, you are likely looking at a redo of a section of the tiled floor and possibly a redo of the entire installation.
Picture Framing
Picture framing is a discoloration of the some portion or the entirety of a tile around its edges. This normally occurs after the wet cutting of the cement tiles, setting the tiles, or immediately after the grouting of the installation. As I will teach you later, cement tiles must be sealed before you cut or set them. If your cement tiles have picture framing, it’s game over. The tiles are toast.

Grout Cracking
When I see grout cracking, it’s usually an indication there are problems with the underlying substrate causing the tiles to flex. Essentially what is happening, twhen someone walks on the tiled floor, the floor underneath the tile gives a little bit causing the tile to flex up and down enough that the tile does not crack but the grout, being inflexible, cracks. I see this often in homes with raised foundations or on the second floor of wood framed homes. On some occasions, I see this on homes with a concrete slab. If you have grout cracking, your tile installation likely needs to be redone. No amount of regrouting will resolve the underlying issue.
Stains of Various Sorts
When working with cement tiles, I often get called to diagnose a staining issue. Staining is when some sort of liquid has penetrated the upper layer of the cement tile, the colored cement layer. If see staining, I need to normally get down on my hands and knees to understand what the stain is and how deep the stain is. I also need to determine if the tiles are indeed stained or if the issue is superficial and the tiles are simply dirty. If the tiles are stained and the damage is not to deep, a standard maintenance will resolve this. Staining occurs at different times but can occur during the setting of tiles, the grouting of the tiles, or, after the installation from some sort of spill. A dead ringer to determine if a cement tile has not been sealed is by encountering some sort of stain.
Facts
OK. So. Here it is. The real scoop. Cement tiles are absolutely one of the best tiles you can have installed in your home. End of story. Period. There are so many benefits to these sorts of tile. Like most things, I have discovered that these tiles have their pros and cons. These pros and cons have been gathered from performing dozens of installations throughout Southern California. You can see some of them here. These include but are not limited to:
Pros
Maintenance
Cement Tiles are easy to clean. Easy to sweep and mop. Just some water and non-acidic cleaner gets the job done.
Longevity
Unlike porcelain or ceramic tiles, you can polish the tiles just like you would stone. Hence, once they start looking a bit grubby, you can simply polish them!
Cons
Installation Difficulty
While these tiles are not impossible to install, they do require several steps that shouldn’t be skipped. Hence, the installation tends to take longer than a standard tile installation.
Cost
Being that the tiles are handmade, they tend to be more expensive than your standard porcelain and stone tiles. Also, because they are heavier, if you can’t find them locally, once you factor in shipping, the final price per tile increases
For customers that
Tile Width
Typical Cement Tiles are normally 5/8″ (1.6 cm) thick. Hence, depending on the the type of substrate you have,
So, here you have it, the definitive guide to sealing, installing, grouting, and polishing cement tiles.
1 Seal the tile
Before you cut, set, or grout Cement Tiles, you must seal them. No matter what anyone tells you (including in many cases the manufacturer / reseller) these must be sealed before the tile setter does anything with them. Period. The second you pull each tile from the box. Seal them. Note, that many of the sealers that are recommended by the manufacturer / reseller are not very good. These sealers tend to be something they carry or have some financial incentive to sell.
2 Test
This following video clearly depicts how cement tiles should be sealed
2 – Install the tile
3 – Grout the tile
4 – Polish the tile
The following video demonstrates how a cement tile floor is polished and sealed.
Cement Tile Reputable Vendors
When people ask me, where should I buy Cement Tiles, I normally send them to one of these vendors / manufacturers.
My cement tiles are cloudy, can you fix this?
It most cases, yes. If the cement tiles came out of the box with a patina finish, the patina finish can be removed. This finish can be eliminated using a standard maintenance procedure. If you are in Southern California, please visit our contact page, enter your contact information, and select Cement Tile – Polish and Seal as the service desired.
After my cement tile installation was grouted, the cement tiles are dirty. Can this be fixed?
In most cases, yes. A standard maintenance can be performed. If you are in Southern California, please visit our contact page, enter your contact information, and select Cement Tile – Polish and Seal as the service desired.
Recent Comments